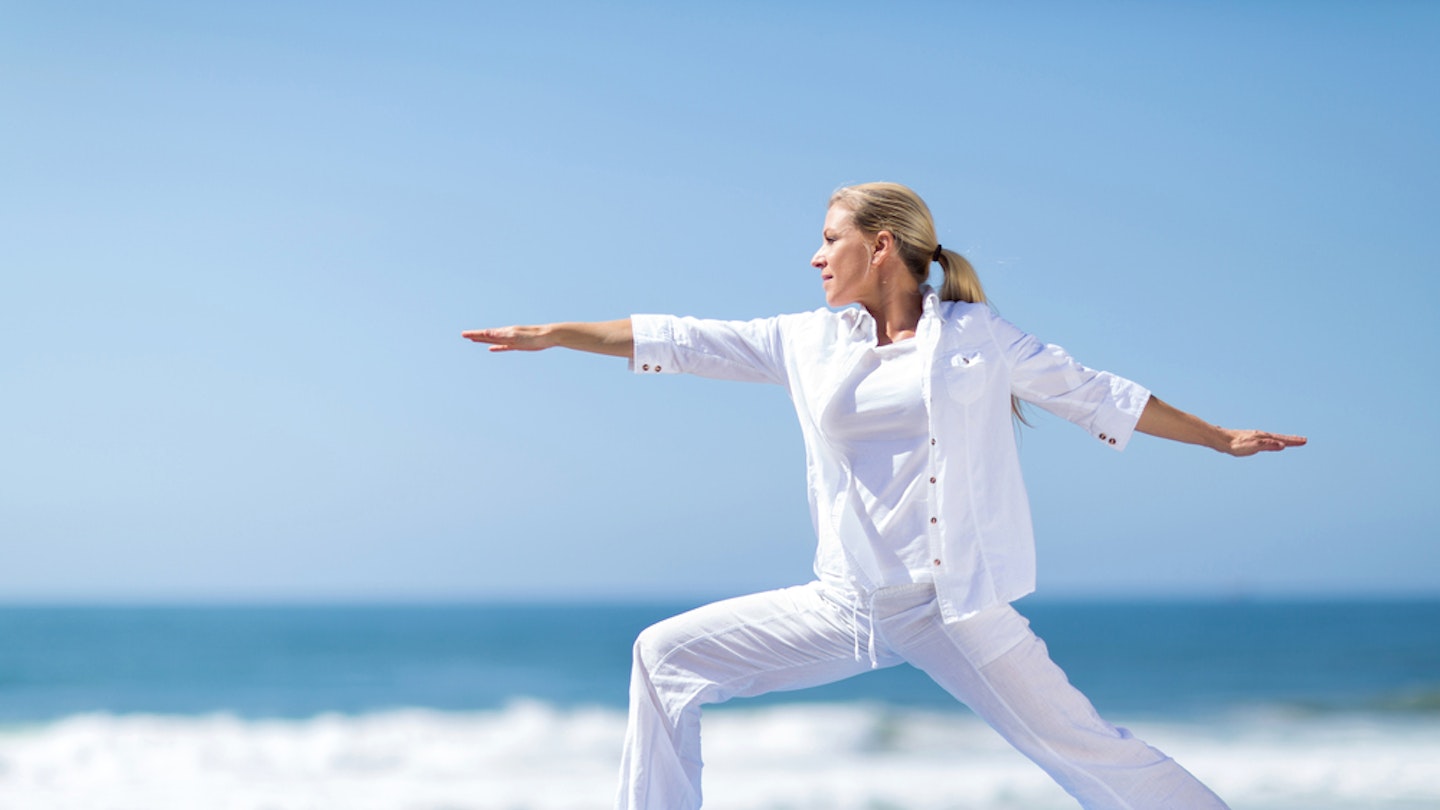
We teamed up with Lots of Yoga to tell you everything you need to know about starting yoga over 50. Developing a yoga practice in your 50s and beyond is one of the best things you can do. By incorporating yoga into your daily routine and mixing it up with your fitness levels, you can stay more in tune with your body and create space for your mind. Yoga has also been scientifically proven to be beneficial to weight loss, overcoming depression and anxiety, plus it is a great platform for making new friends. We've teamed up with Lots of Yoga and asked them about yoga for over 50s and got some yoga exercises that will work for different levels of fitness.
Yoga Over 50 - What's your fitness level?
So many people seem to think that because they can't touch their toes, they shouldn’t do yoga. That’s complete and utter nonsense. Yoga is about learning to synchronise your breath with movement, and eventually develop an inner sense of peace. It really has no specific end-goal, nor does it require anyone to ‘look’ the part. Here we break down three levels of fitness, and you can start practising each pose for three to five breaths, at a level that does not strain your breathing. By slowing working through the levels (ideally six days a week), you should slowly see a difference in your flexibility, strength and level of calmness. Finally, don’t forget to consult your doctor on the suitability of any physical exercises. And we strongly encourage you to find a teacher that you can practise with and learn from!
(A) Inactive
You are at Level A if you have not been exercising and want to start now.
(B) Fairly active
So you're reasonably active. You may squeeze in a workout once in a while, or you might just have a busy day-to-day life, running around for work or chasing after kids. You most probably view yourself as active but not exactly athletic. You're a level B.
(C) Active
Level C's are those who have always worked out in some way and view themselves as 'active' to 'very active'.
Yoga poses For Over 50s
Here are four yoga poses and three variations of each for you to try depending on your level of fitness. Try to hold each pose for three to five full breaths.
1. Downward Facing Dog (Adho Mukha Svanasana)
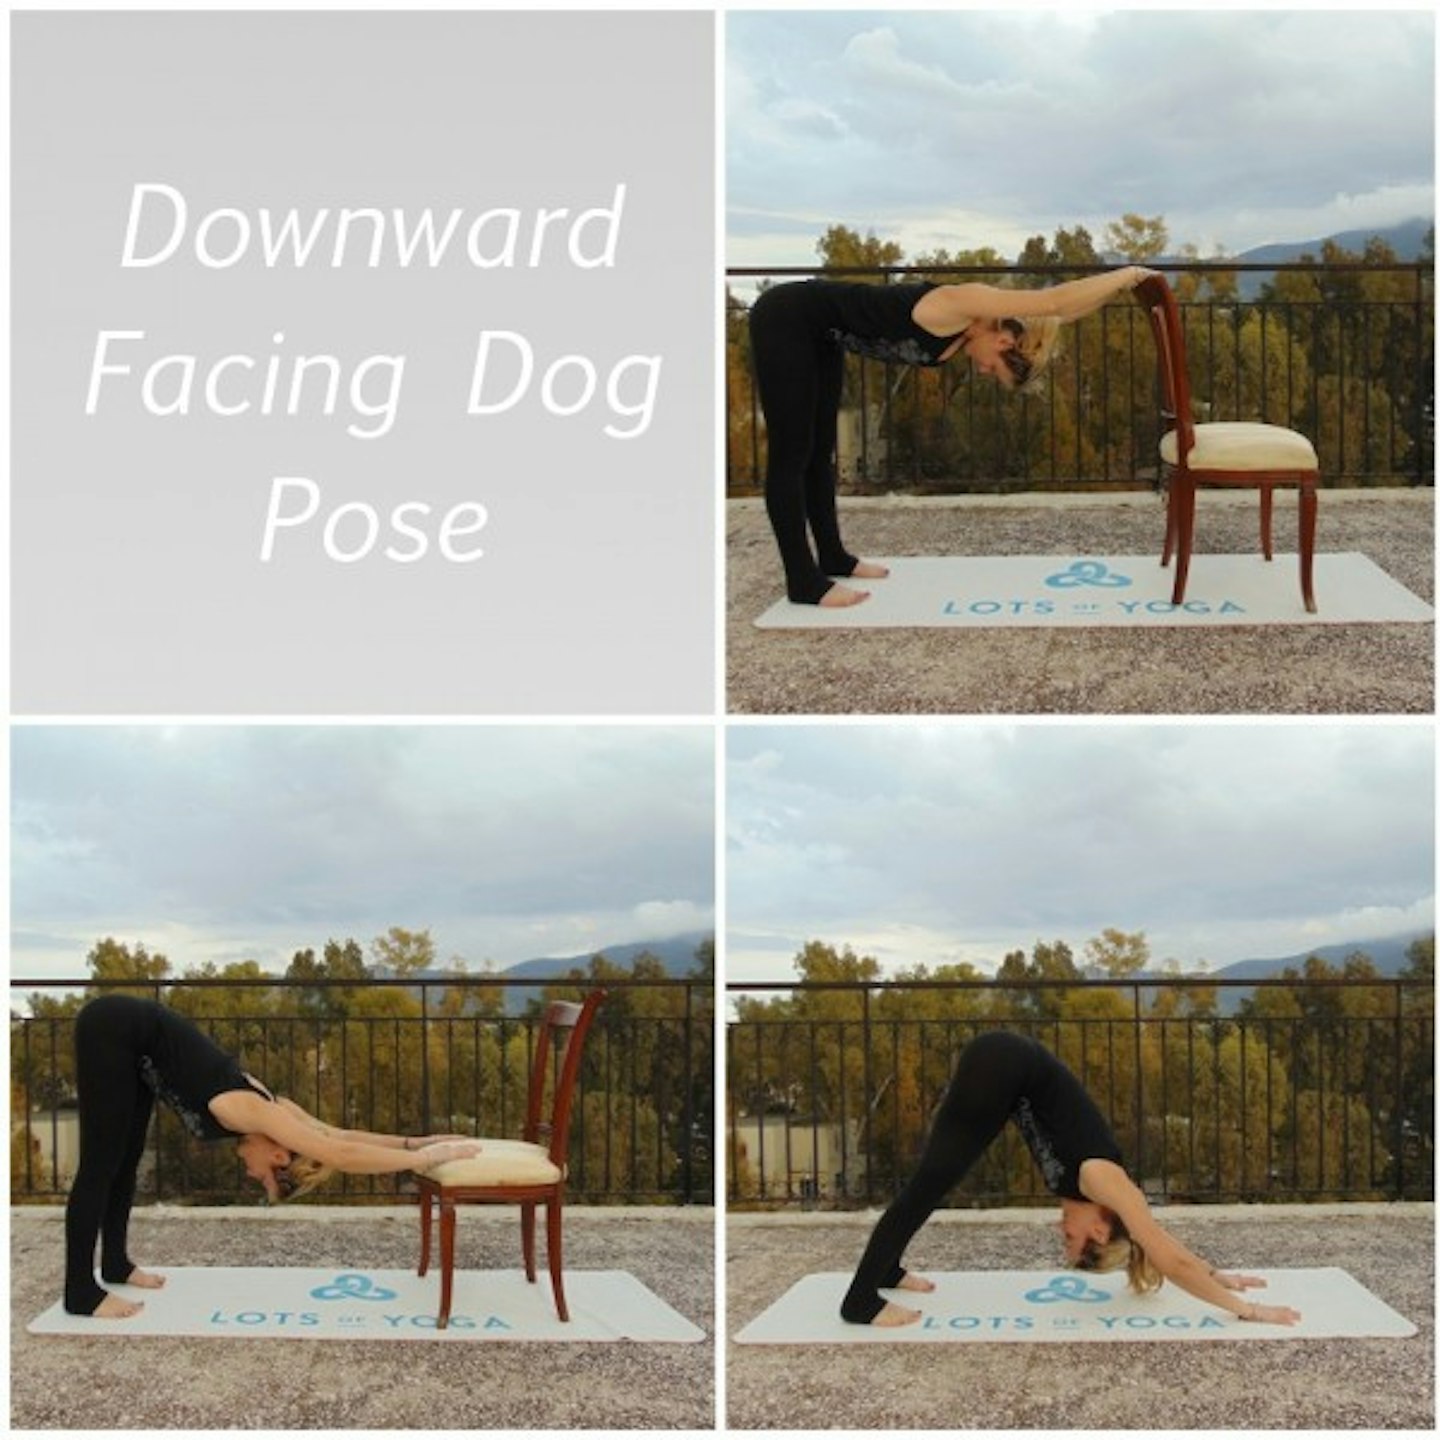
Downward Dog is to many the staple pose in yoga; you could do up to 30 or more Downward Dog poses in any given yoga-flow class! Its benefits include opening of the shoulders and the chest, as well as stretching the hamstrings and spine. From a kneeling position on hands and knees, step on the toes keeping the hands and feet securely in place, and lift the bottom all the way up towards the ceiling, aiming to gently push the head towards the knees, creating an upside-down V shape. Hands should be shoulder-distance apart, feet hip-distance apart and the gaze between the thighs or at the navel.
(A) Lean on the back of a chair
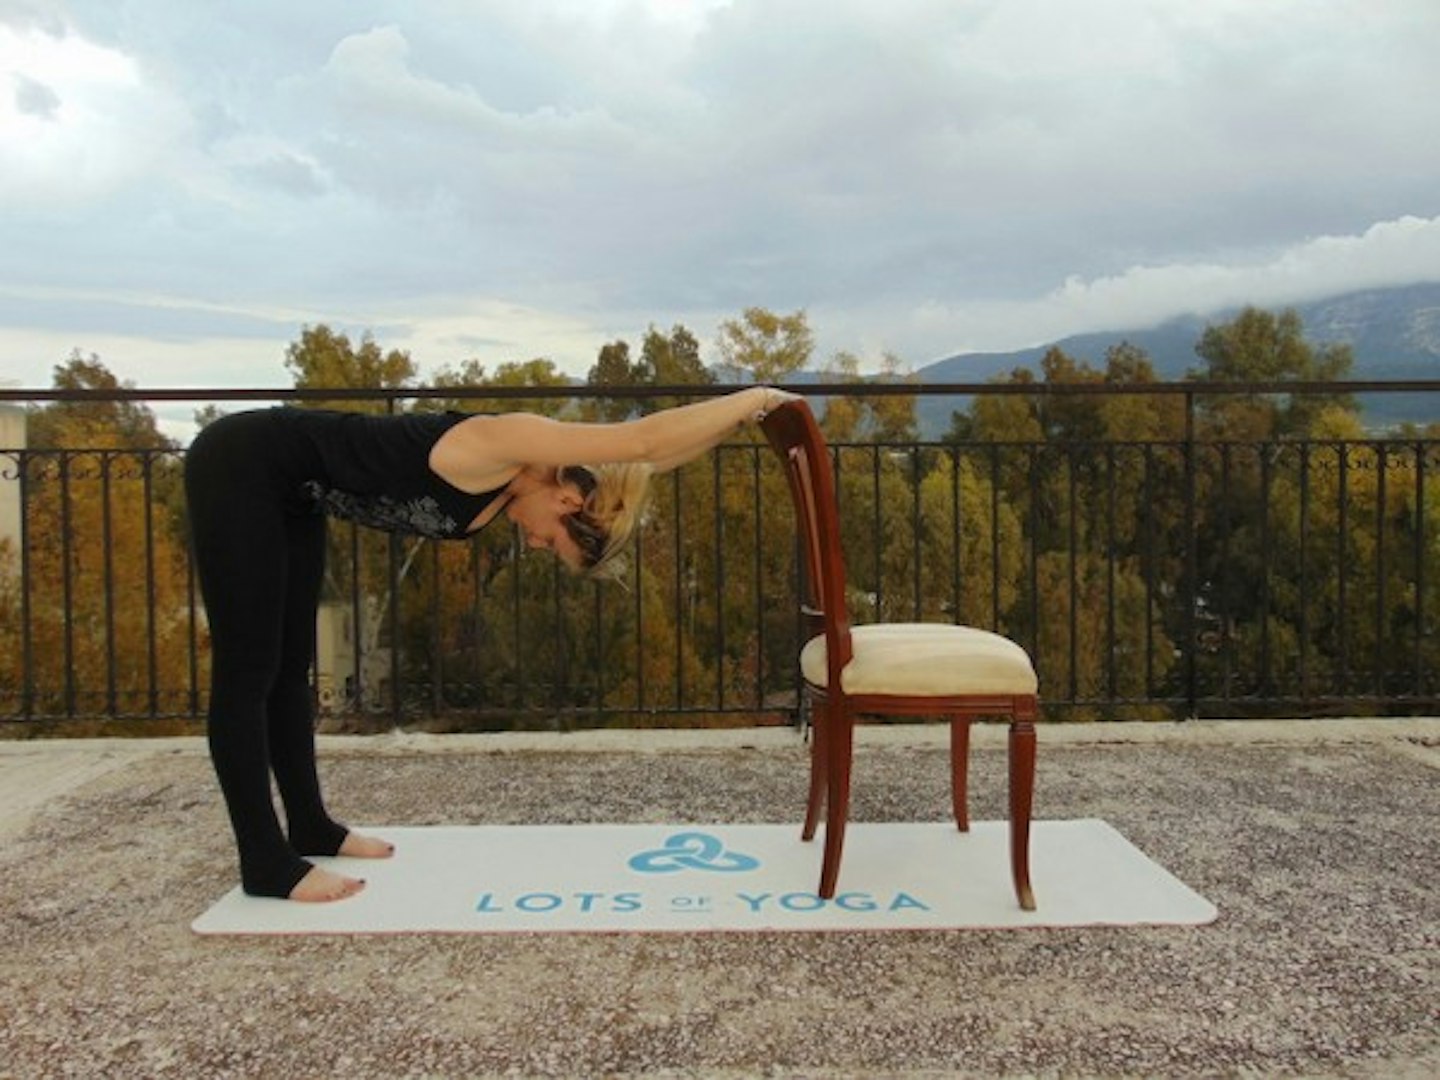
Place your hands on the back of a chair and try to get your head past the forearms to get a maximum stretch in the shoulders.
(B) Lean on the seat of a chair
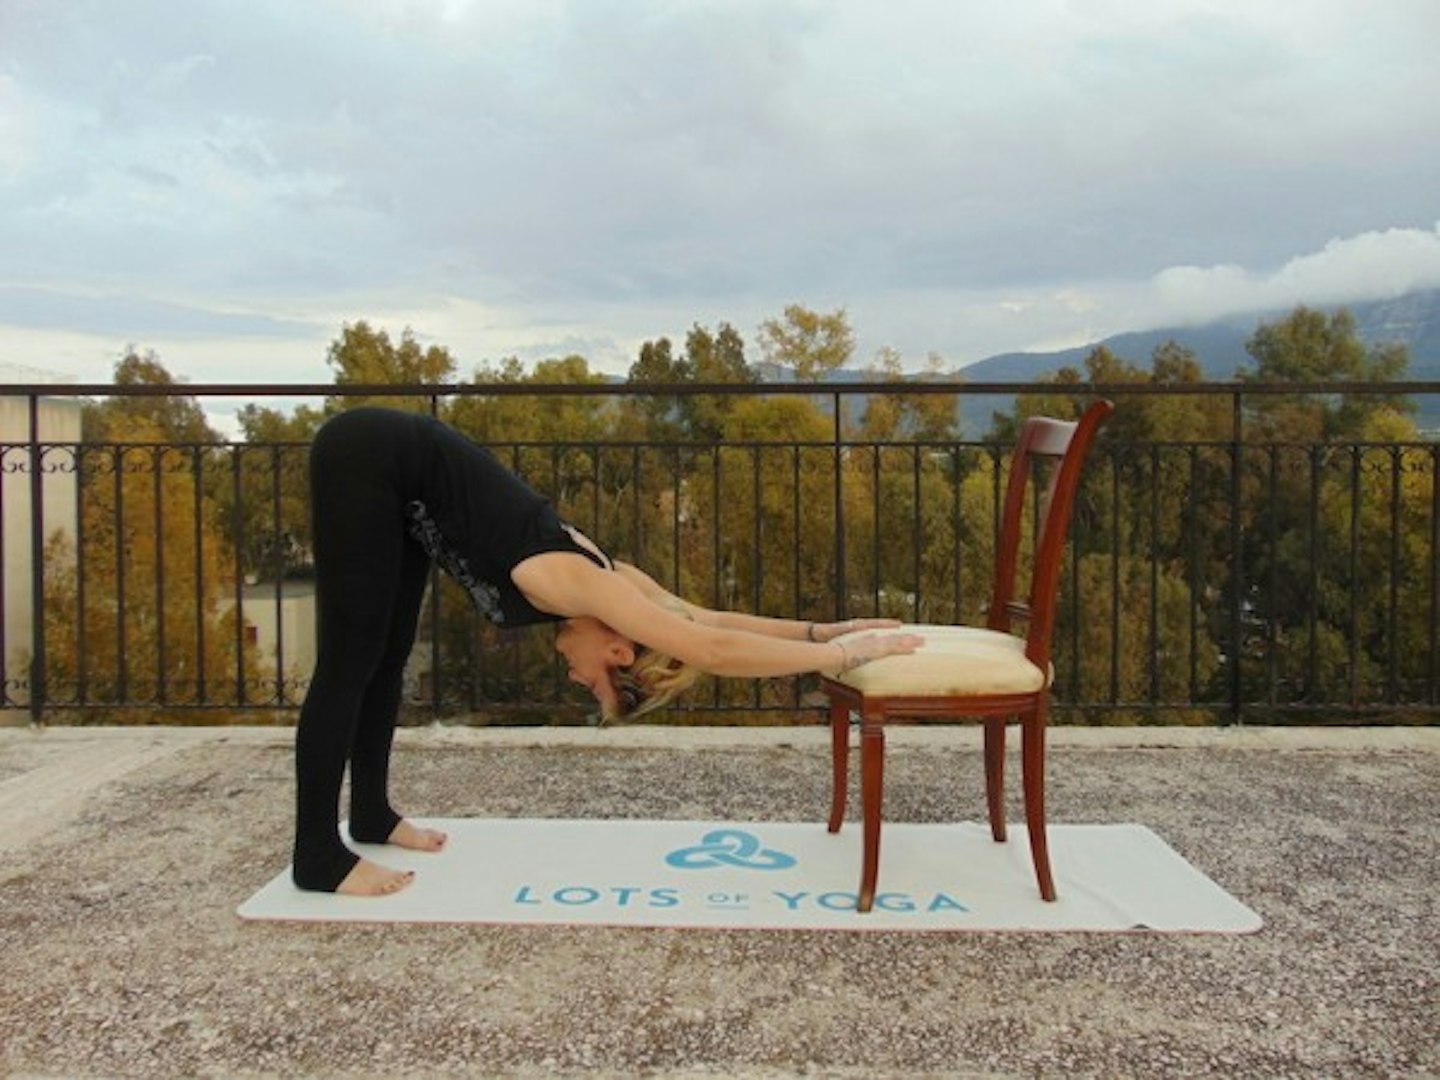
Use the seat of a chair to get further towards the ground. Bend the knees to relieve tension in the hamstrings.
(C) Full Downward Facing Dog
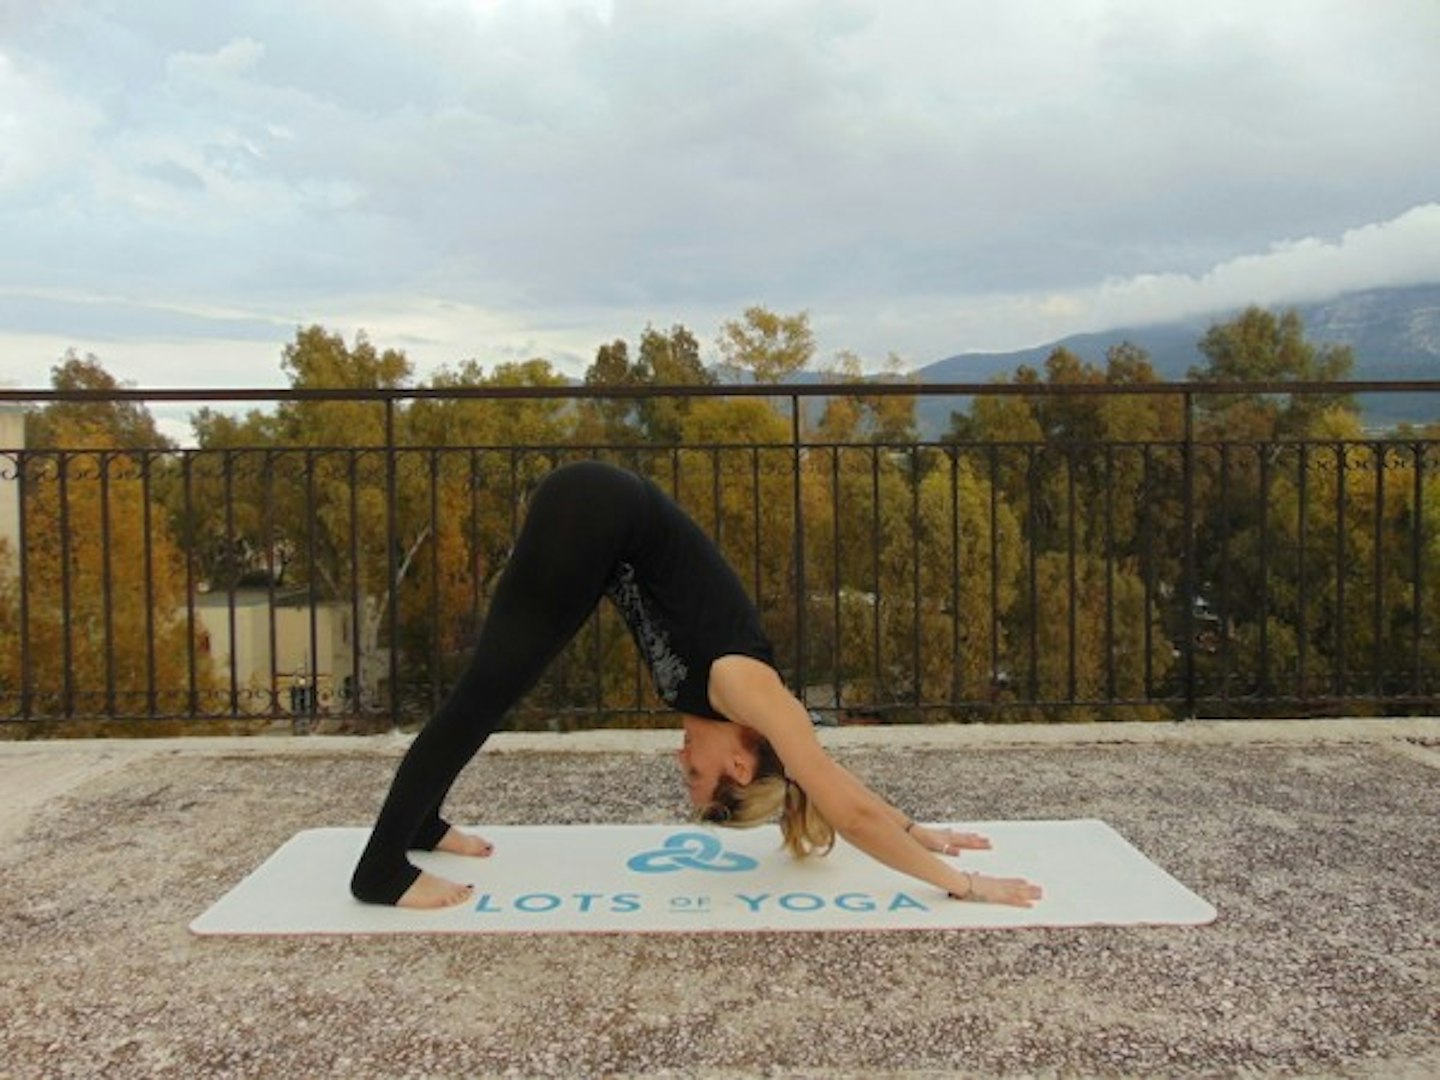
Place hands shoulder distance apart on the mat, and feet hip distance apart, push through the hands and feet, while opening the chest and head towards the floor.
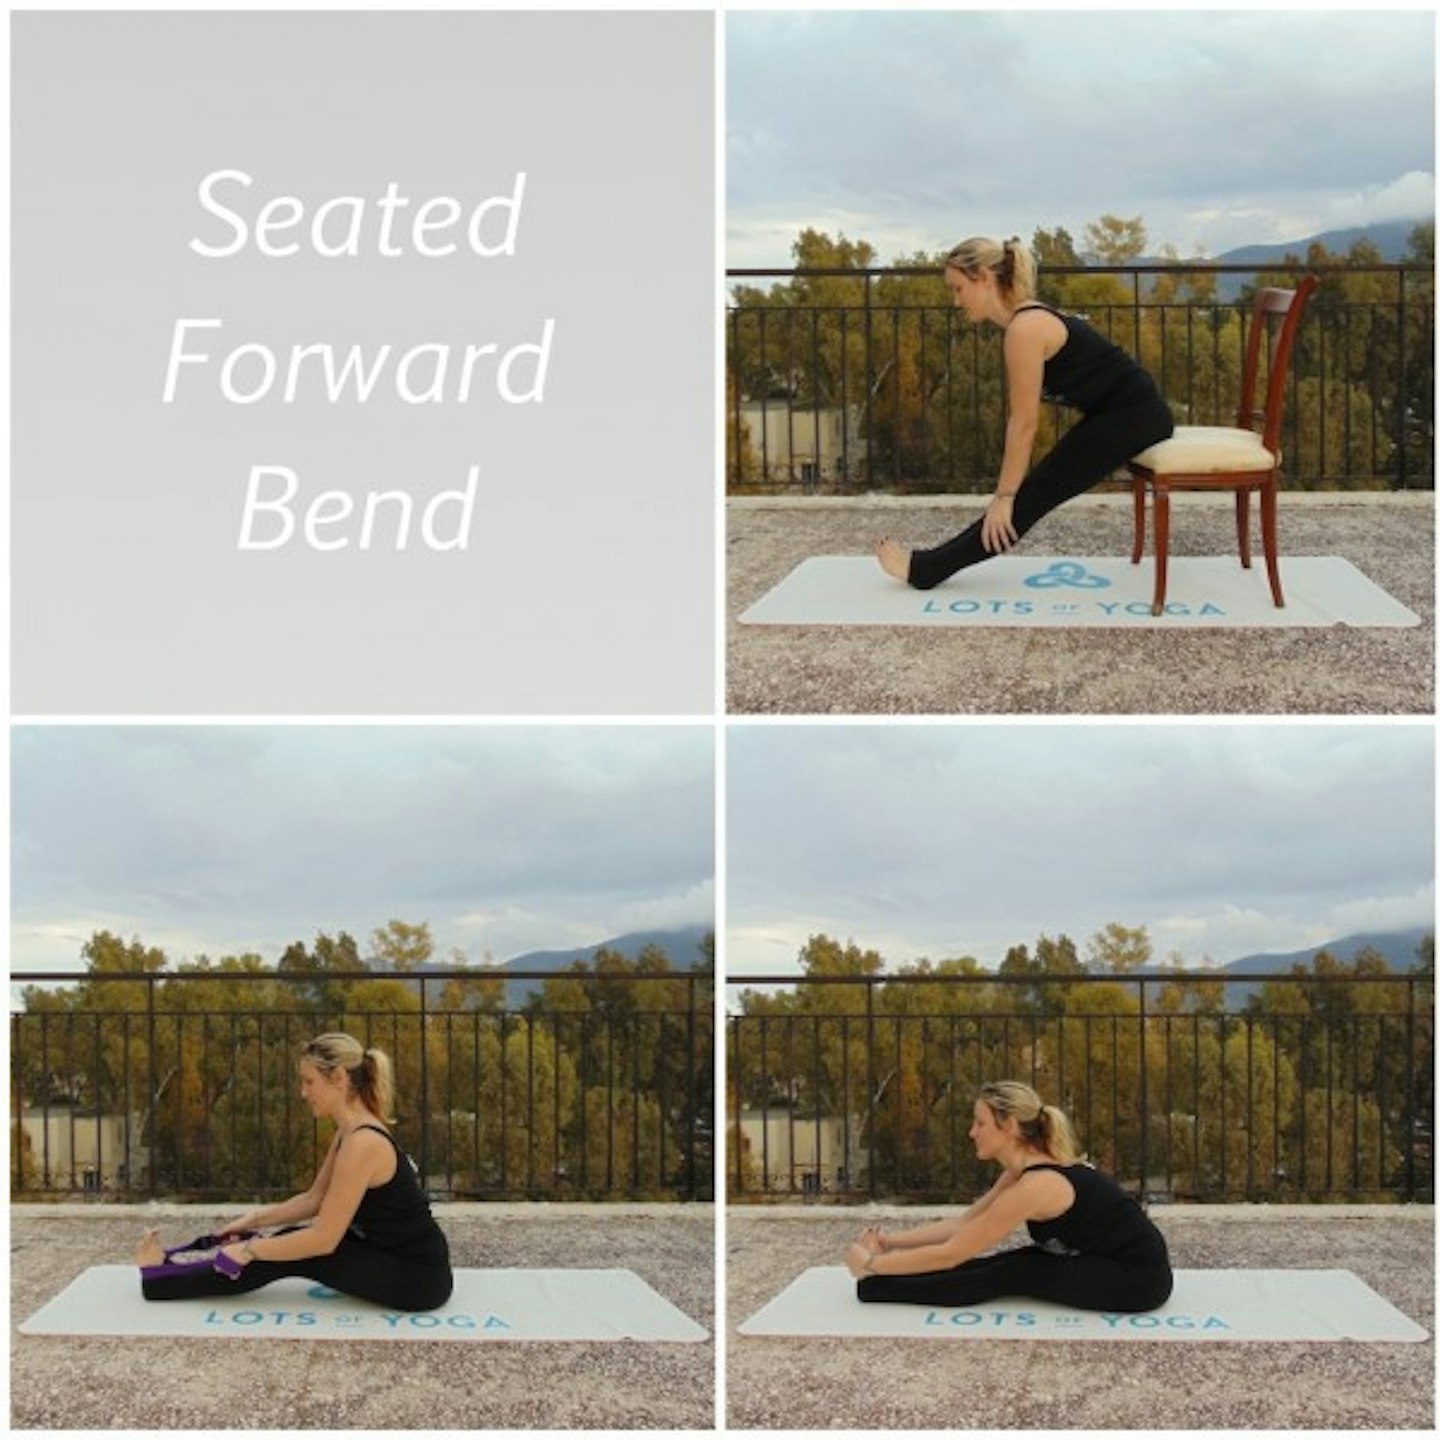
2. Seated Forward Bend (Paschimatanasana)
The Seated Forward Bend as well as being a great pose in itself, stretching the hamstrings and the spine, is also often used as a restorative yoga pose to relieve pressure in the lower back and back pain in general. From a seated position, stretch out the legs in front of you, keeping the back as straight as possible, hinge forwards from the hips, trying not to round the back, as far as you can go, and holding the pose there.
(A) Sit on a chair
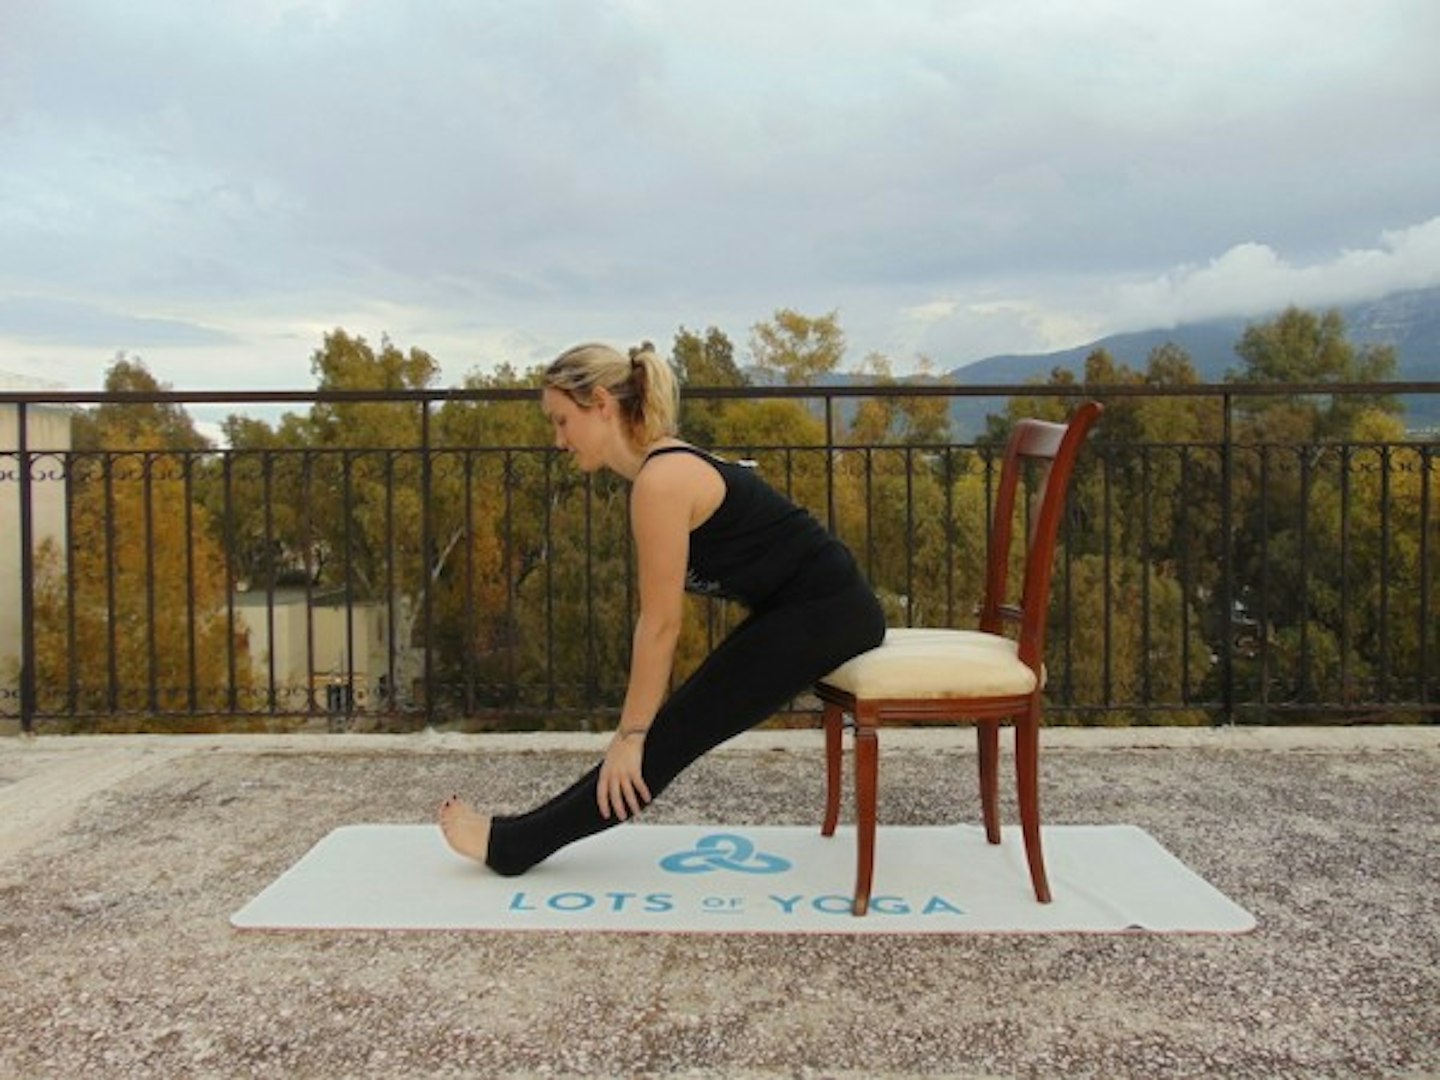
Sit on the edge of a chair and bend forward at the hips, keeping the spine straight.
(B) Use a strap.
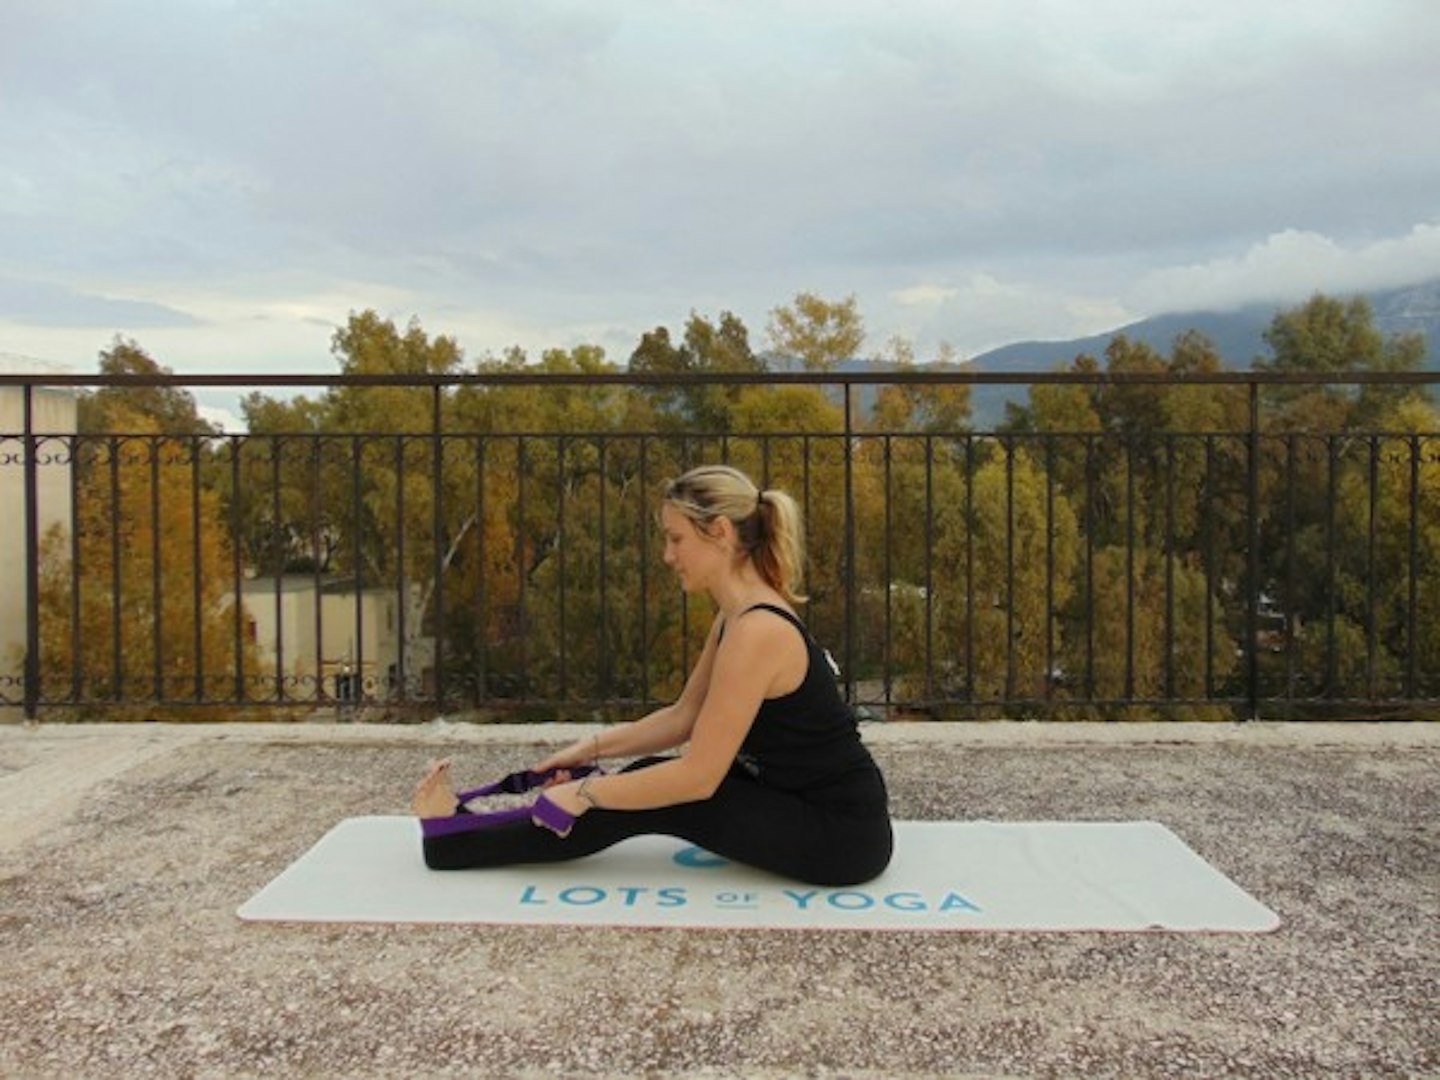
Wrap a strap around the feet and hold onto it while gently pulling yourself forward keeping the spine as straight as possible.
(C) Full Seated Forward Bend
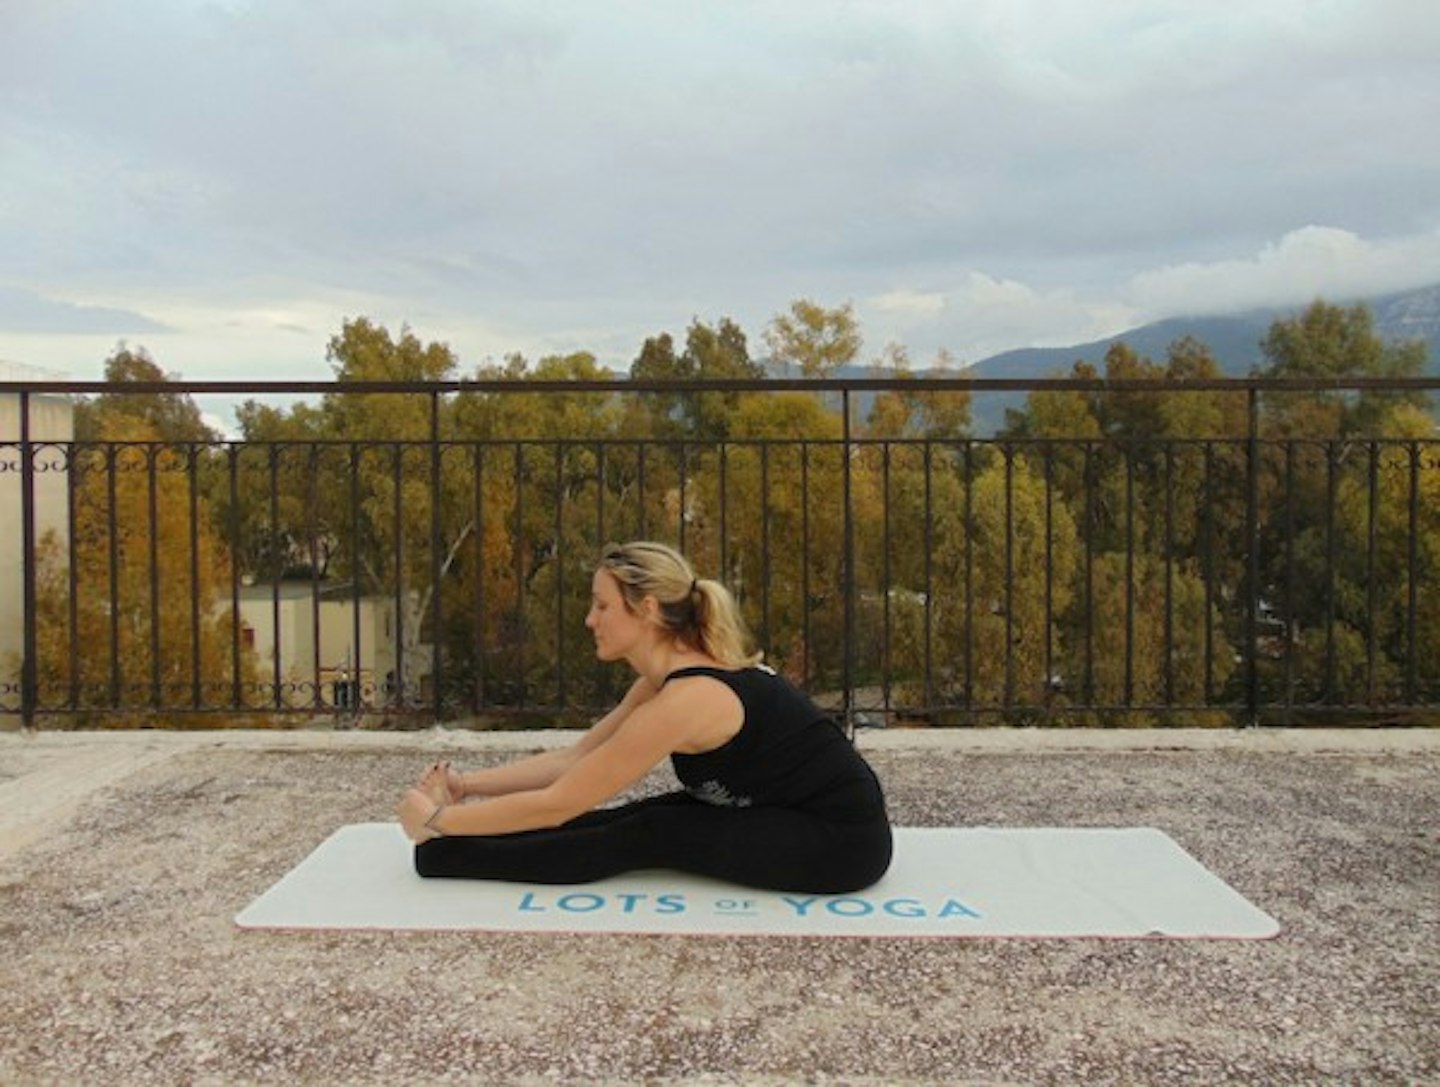
With the legs stretched out in front of you, fold forwards bending at the hips and hold on to the feet, with a slight bend in the knees to relieve any tension in the hamstrings.
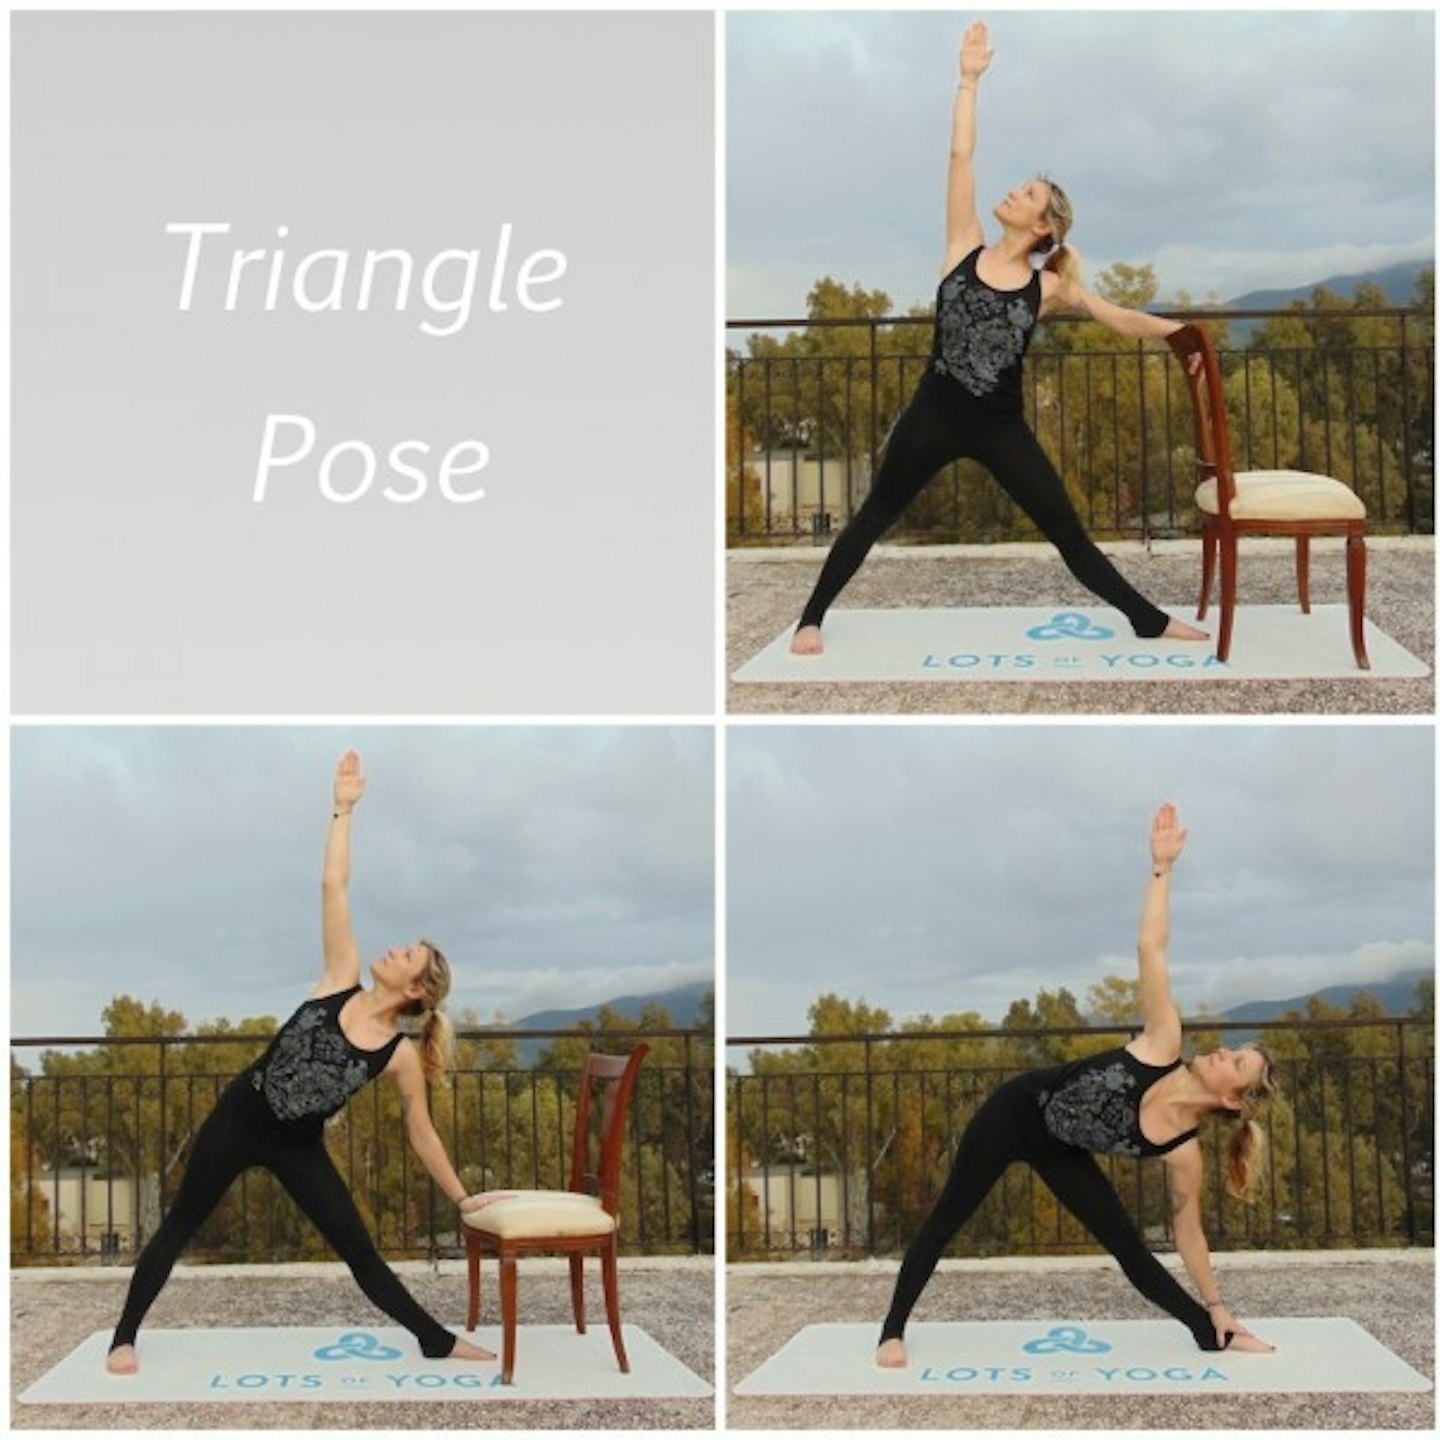
3. Triangle Pose (Trikonasana)
One of the most popular poses in yoga's standing sequence, Triangle Pose provides a deep stretch in the hamstrings, the side body, opens up the chest and shoulders, and really utilises the spine's capacity, giving it a much-needed stretch. From standing, take a big step back, keeping feet on either side of an imaginary line, the front foot facing forwards and the back foot angled inwards at 45 degrees. Raise the arms out by the side, lean the upper body forward over the front leg, and twist the torso so that the front hand comes down to meet the front foot, and the other hand is raised to the sky, keeping the gaze on the upper hand.
(A) Lean on the back of a chair.
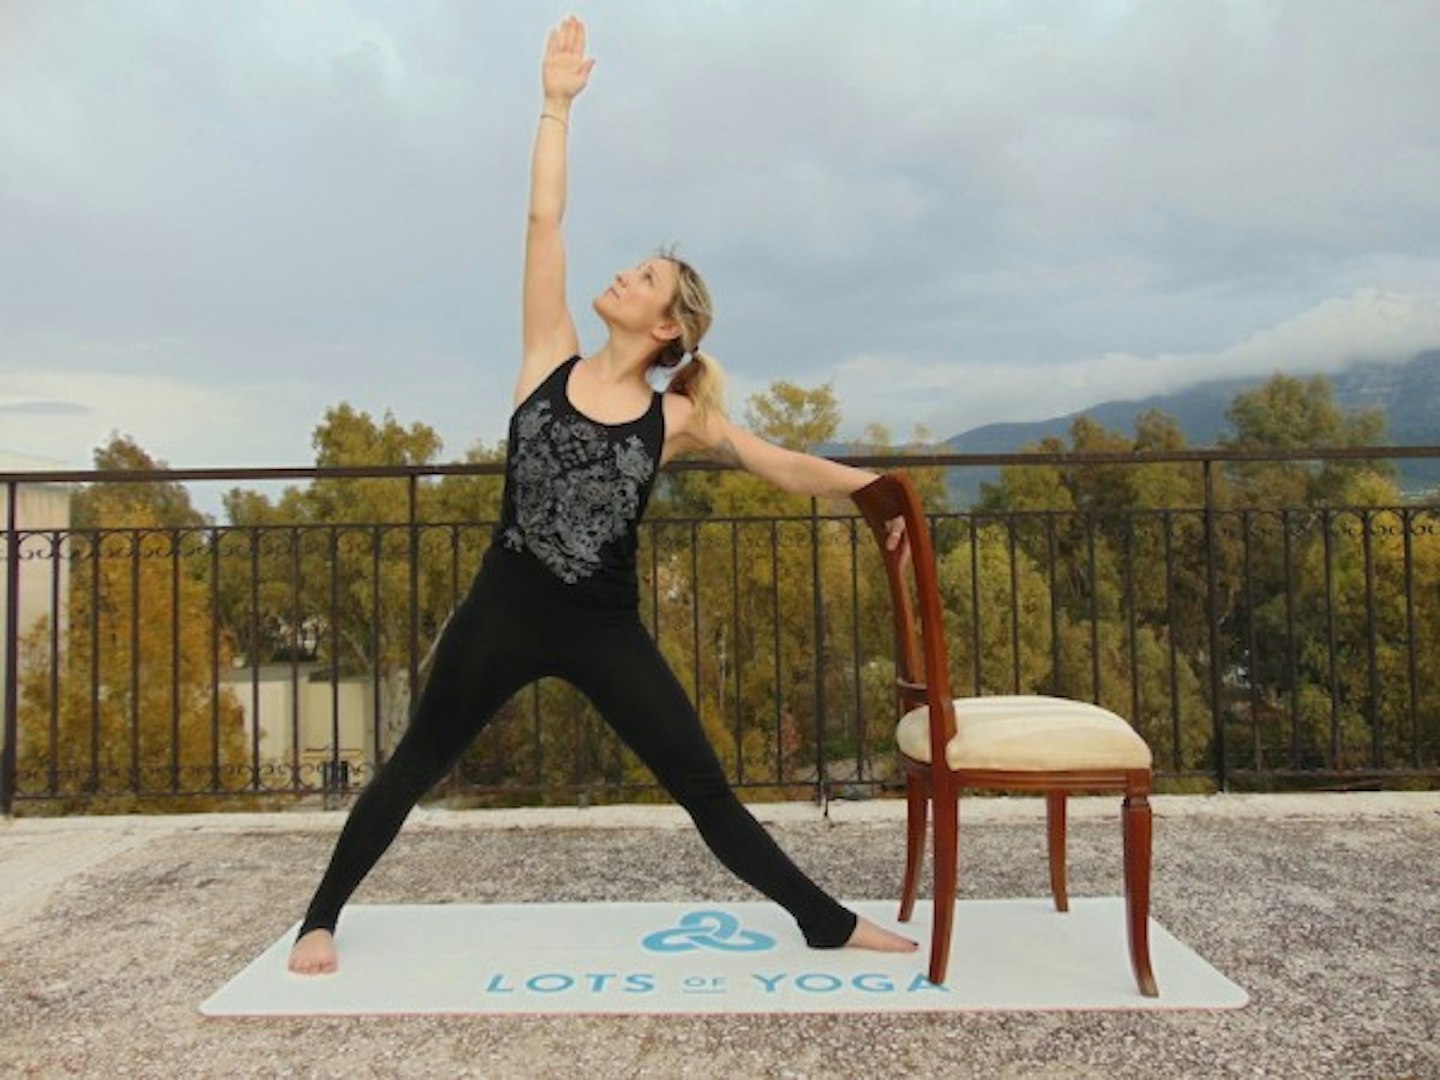
From standing, take a big step backwards and hold on to the back of a chair with one hand, raising the other hand and upper body towards the sky.
(B) Lean on the seat of a chair.
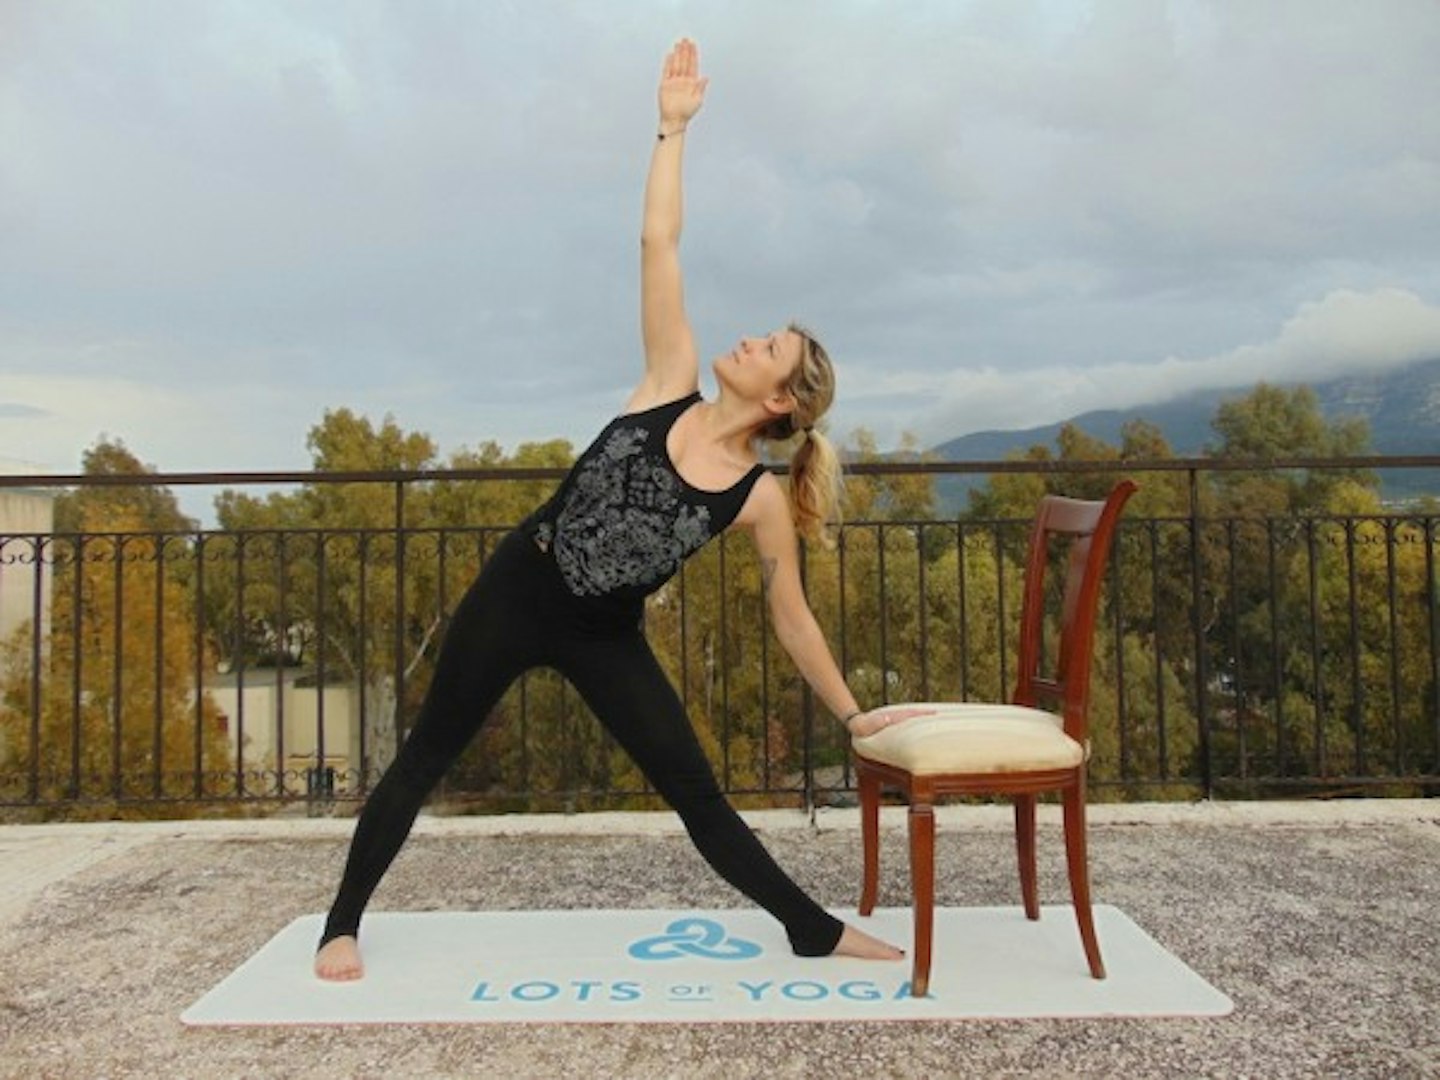
Leaning on the chair seat, twist the upper body and upper hand towards the sky.
(C) Full Triangle Pose
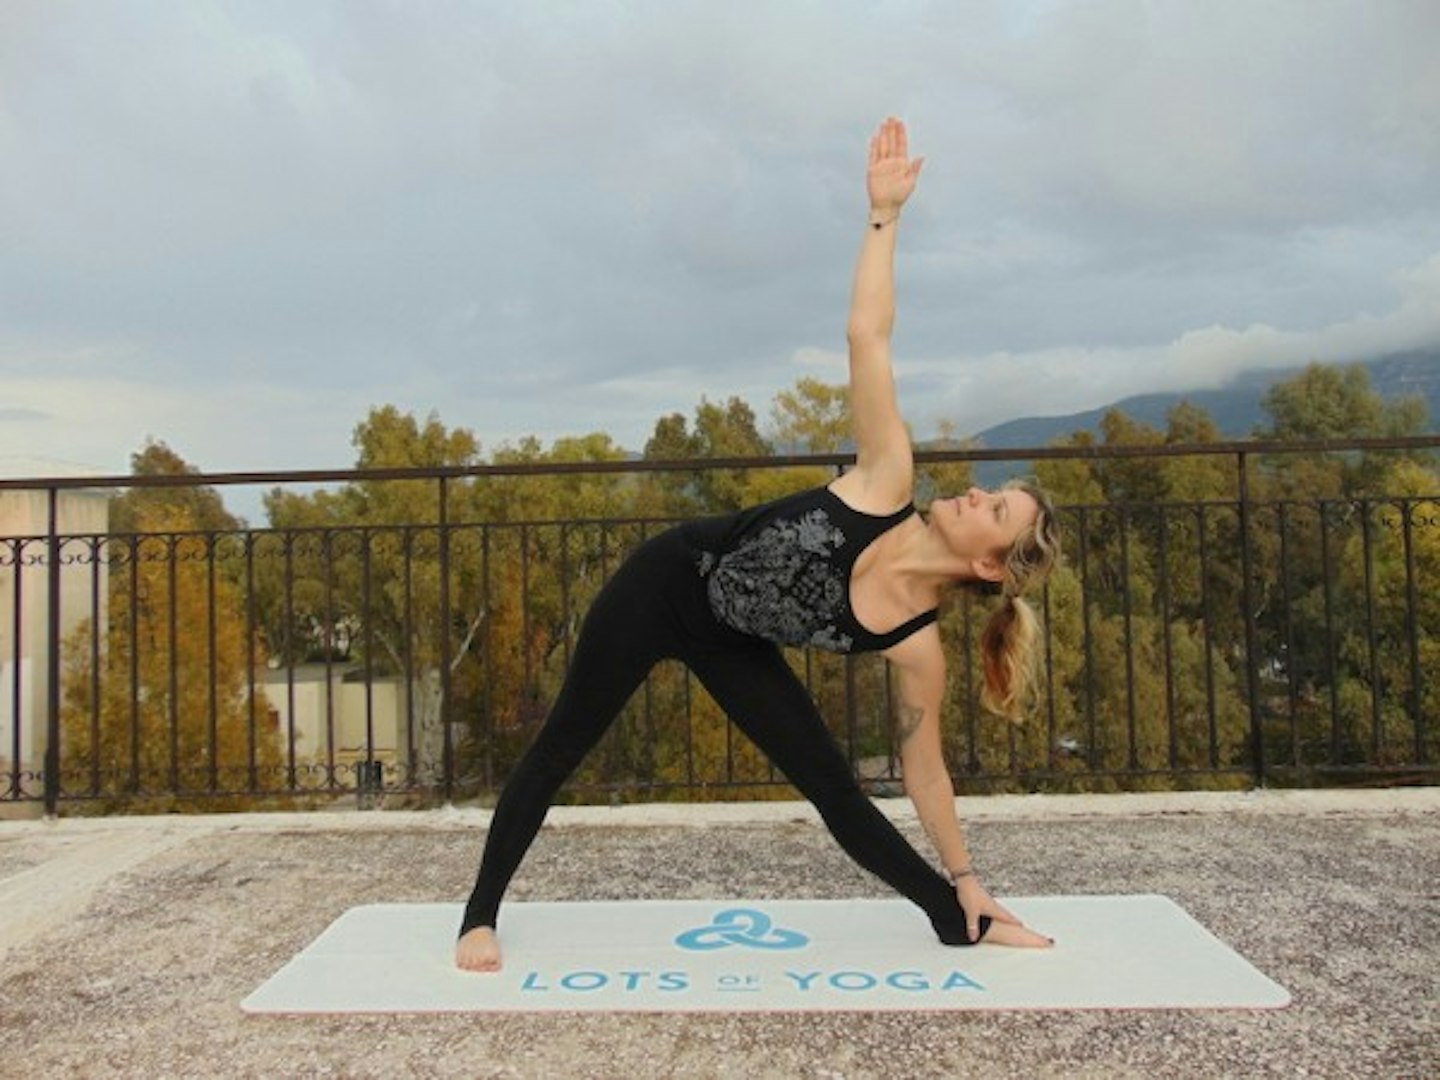
Trying to keep the upper body and pelvis tucked in, bend the upper body down towards the foot whilst rotating the upper body upwards and gaze towards the sky.
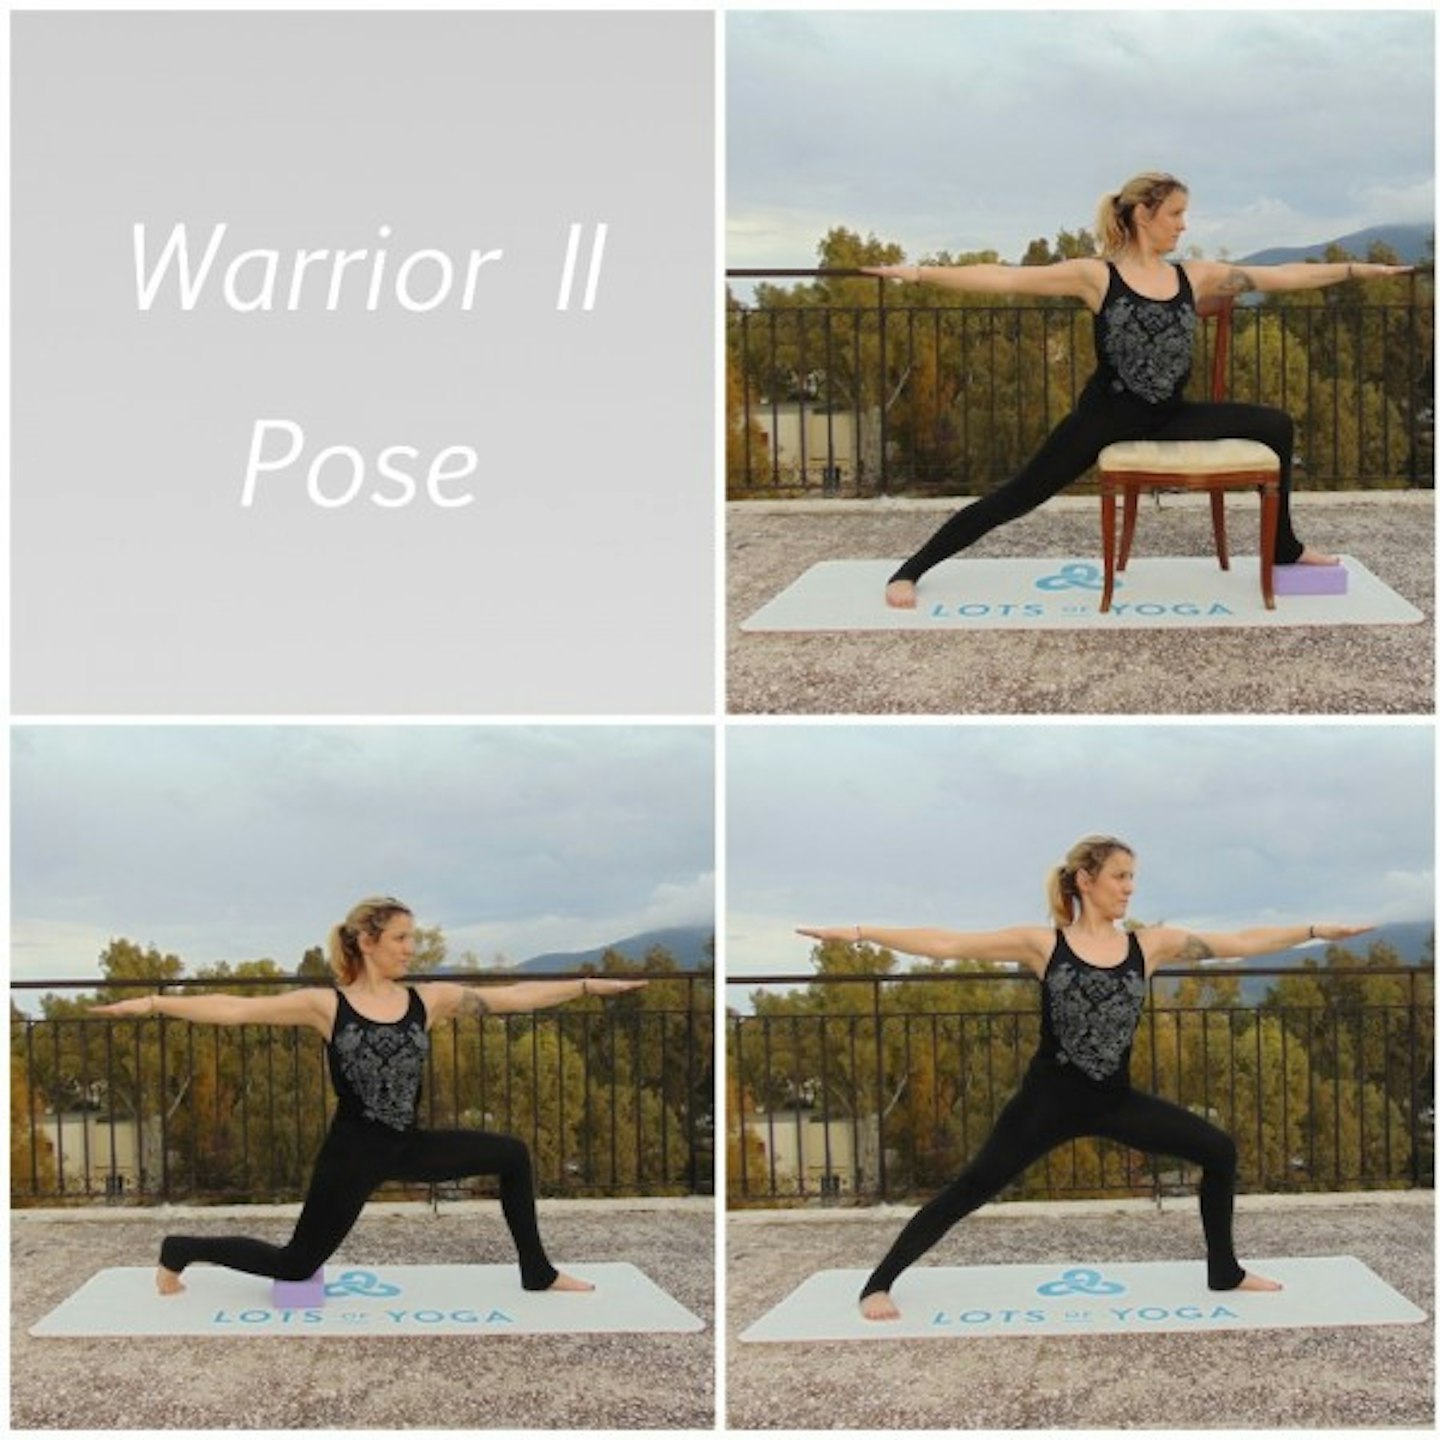
4. Warrior II Pose (Virabhadrasana II)
Another yogi favourite, Warrior II pose is as strong as it sounds. Done properly, it works out the core, the legs (especially the thighs), opens up the shoulders and tones up the bum. From standing, take a big step back, keeping feet on either side of an imaginary line, the front foot facing forwards and the back foot angled inwards at 45 degrees. Bend the front knee so that the knee is directly above the ankle. Raise the arms out by the side, and face forwards, gazing over the front arm.
(A) Straddle a chair.
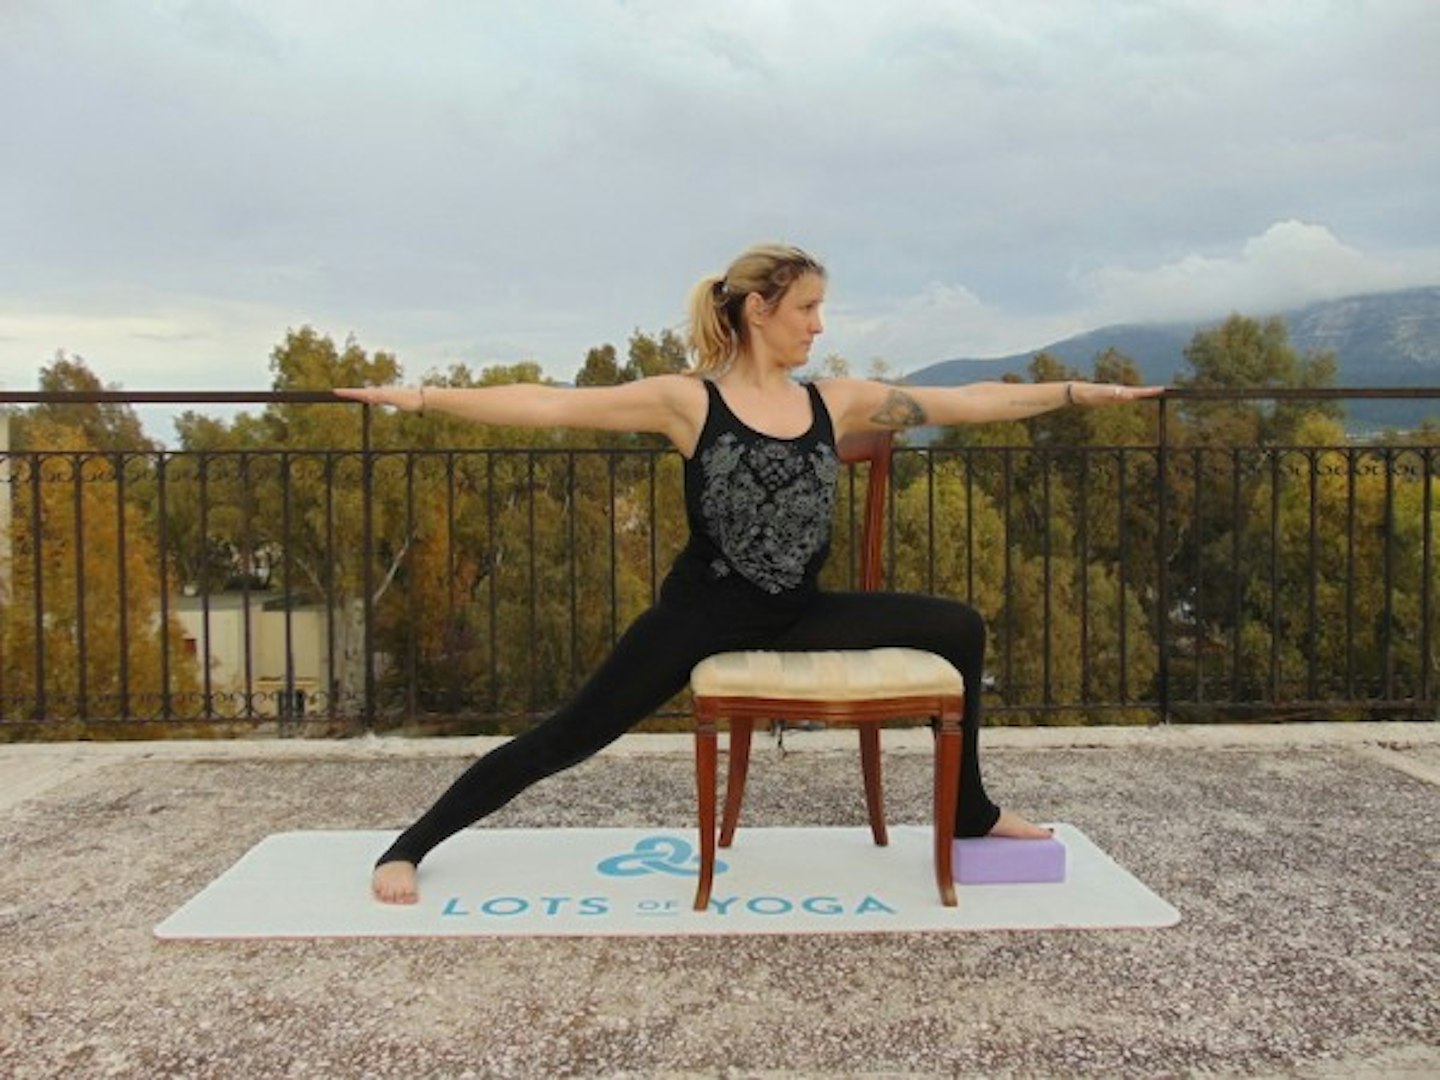
Sit on a chair sideways so that your front leg is over the chair and the back leg is on the floor, foot turned in at a 45 degree angle. Raise the hands up so they are parallel to the floor and gaze forwards.
(B) Put the back knee on a prop.
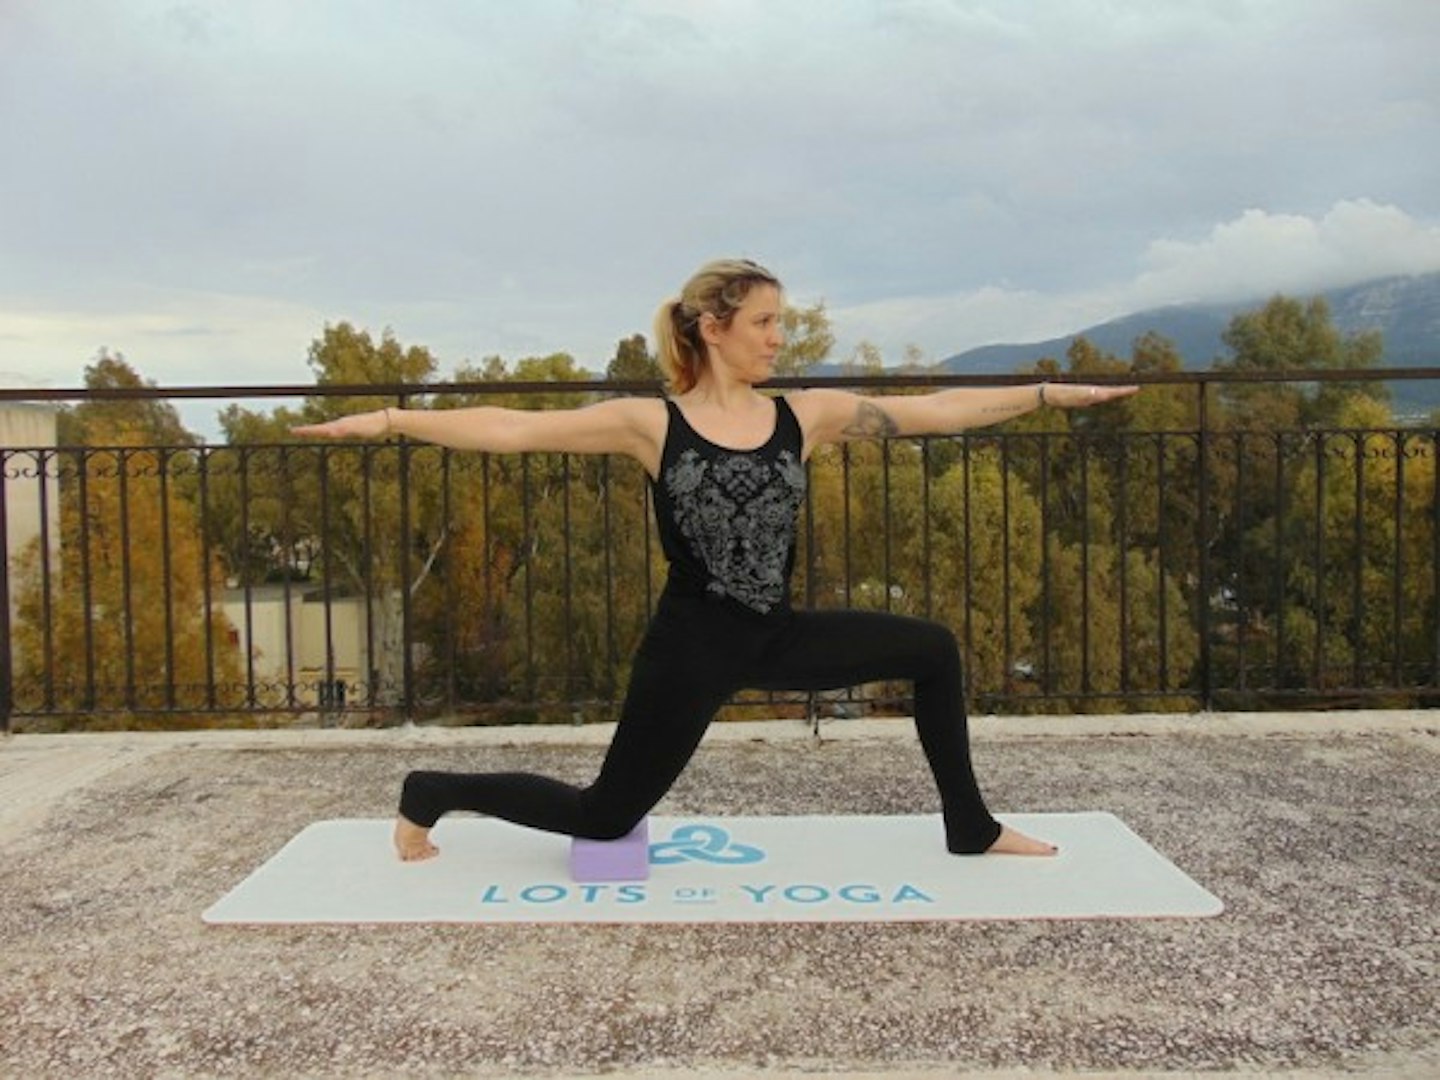
With this variation, you can keep the back knee on the floor or on a block, keeping the front knee directly over the ankle.
(C) Full Warrior II Pose
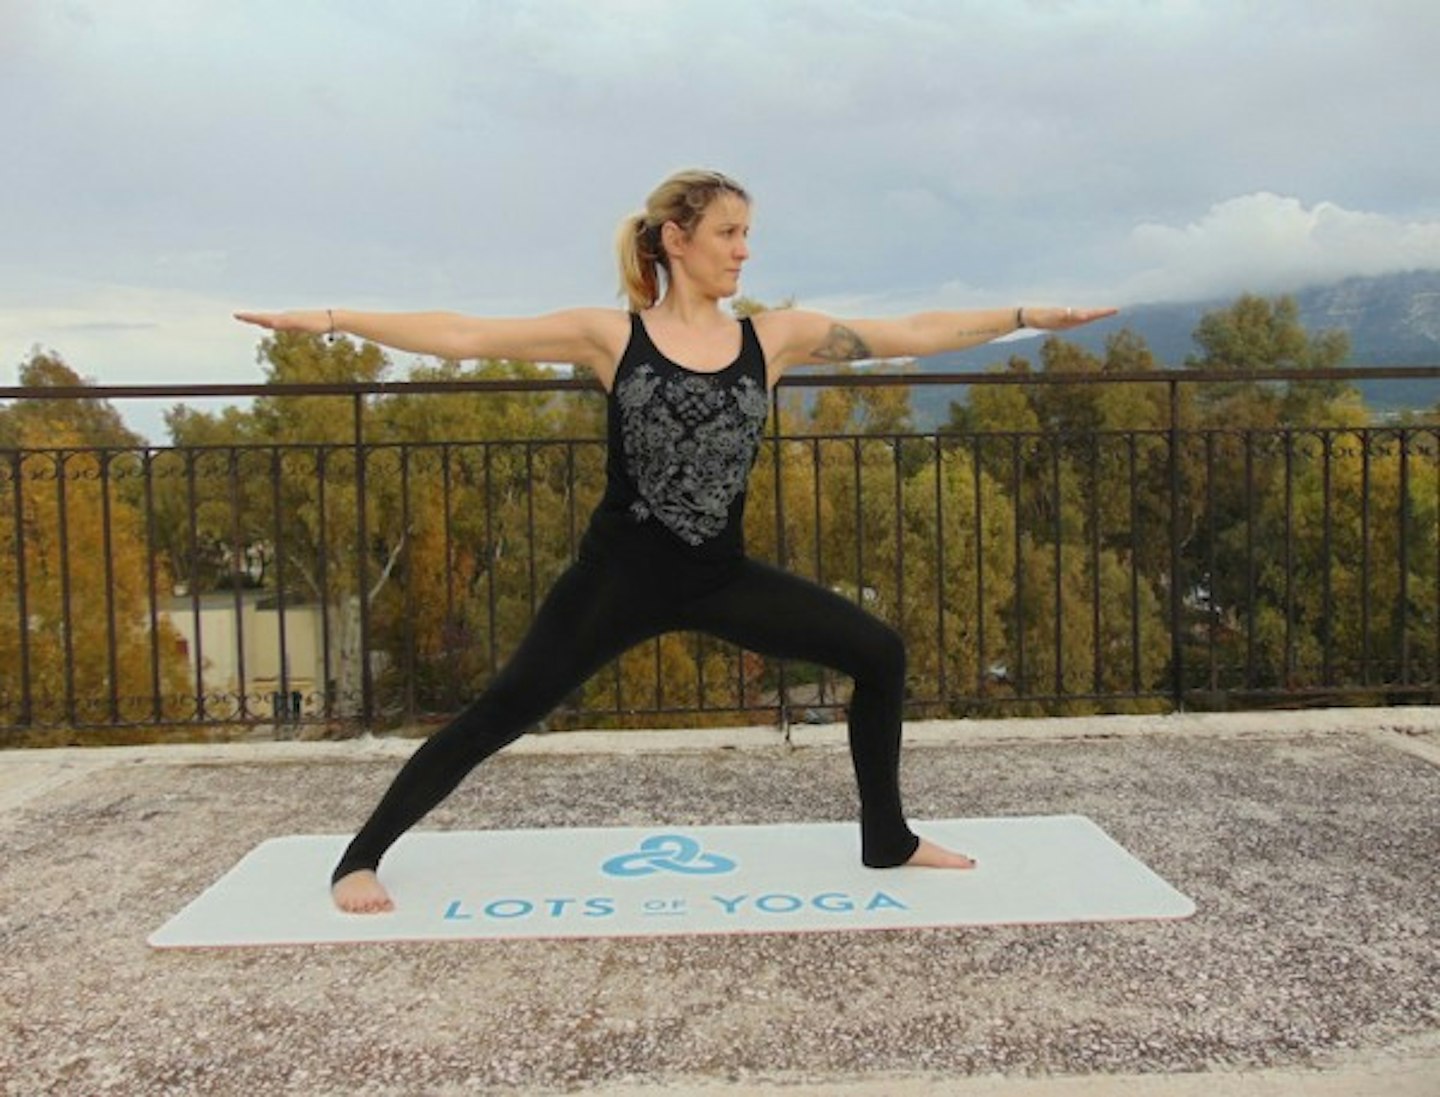
Keep your weight distributed evenly between the back and front legs, keep the front knee over the ankle and body straight, facing forwards.
And when you are done, we encourage you to lie down on the mat in a pose called 'savasana', also known as 'corpse pose'. Try to take 10 full breaths. If you have never tried meditating before, try to remind yourself to let go in this pose, letting your body relax and completely melt into the mat. Remember, in the beginning some poses may be more challenging than others, but by persisting every day, you will start to build confidence and your muscles will adapt, getting stronger and leaner.
Fancy a challenge? Many of these poses can also be performed in the air as part of aerial yoga, which also has many benefits.
The best yoga mats for over 50s
If you liked this, then you will probably want to invest in a yoga mat to help you practice these poses. Whether you're new to yoga or looking for a new mat that will help you feel more grounded, we've found everything you need.
Just so you know, whilst we may receive a commission or other compensation from the links on this page, we never allow this to influence product selections.
The best yoga mats for over 50s
.jpg?auto=format&w=1440&q=80) 1 of 6
1 of 6Lixada Yoga Mat
Practice and perfect your cobra move on a Lixada Yoga Mat. Feel at one with yourself and the floor, as its non-slip texture will stay in place on the ground. Pros: At 6mm, this mat is fantastic for giving you extra support on your knees and those trickier poses. Cons: The smell from the mat is quite powerful when you first buy it. Airing it out should stop this from being a problem.
 2 of 6
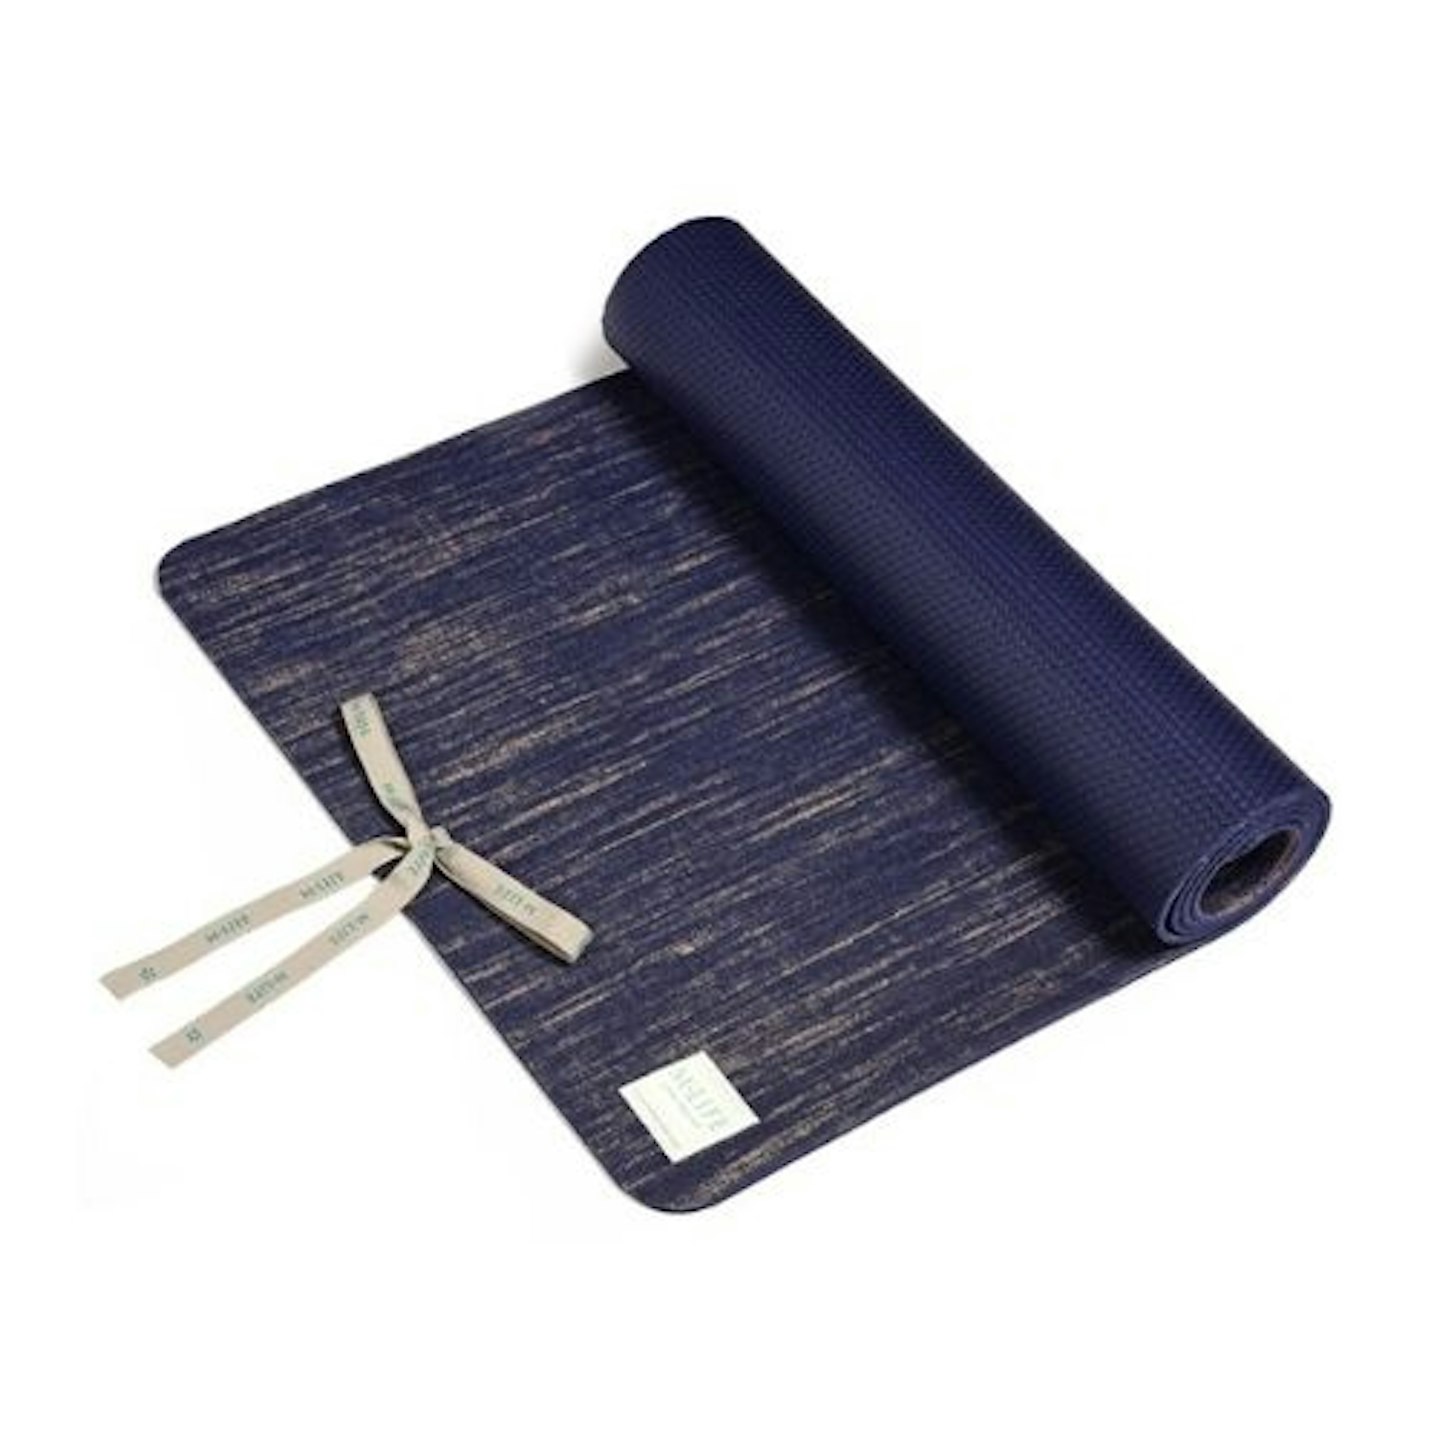
M Life Linen 5mm Yoga Mat
Treat yourself to this gorgeous best seller from John Lewis & Partners. Practice day in and day out for the next few months and you'll be able to touch your toes. Pros: Are you looking for a thick mat that will help you remain grounded? This non-slip grip mat is exactly what you've been looking for. Cons: It was hard to find any cons for this lovely yoga essential, the only thing we could find is that it is narrower than other mats.
 3 of 6
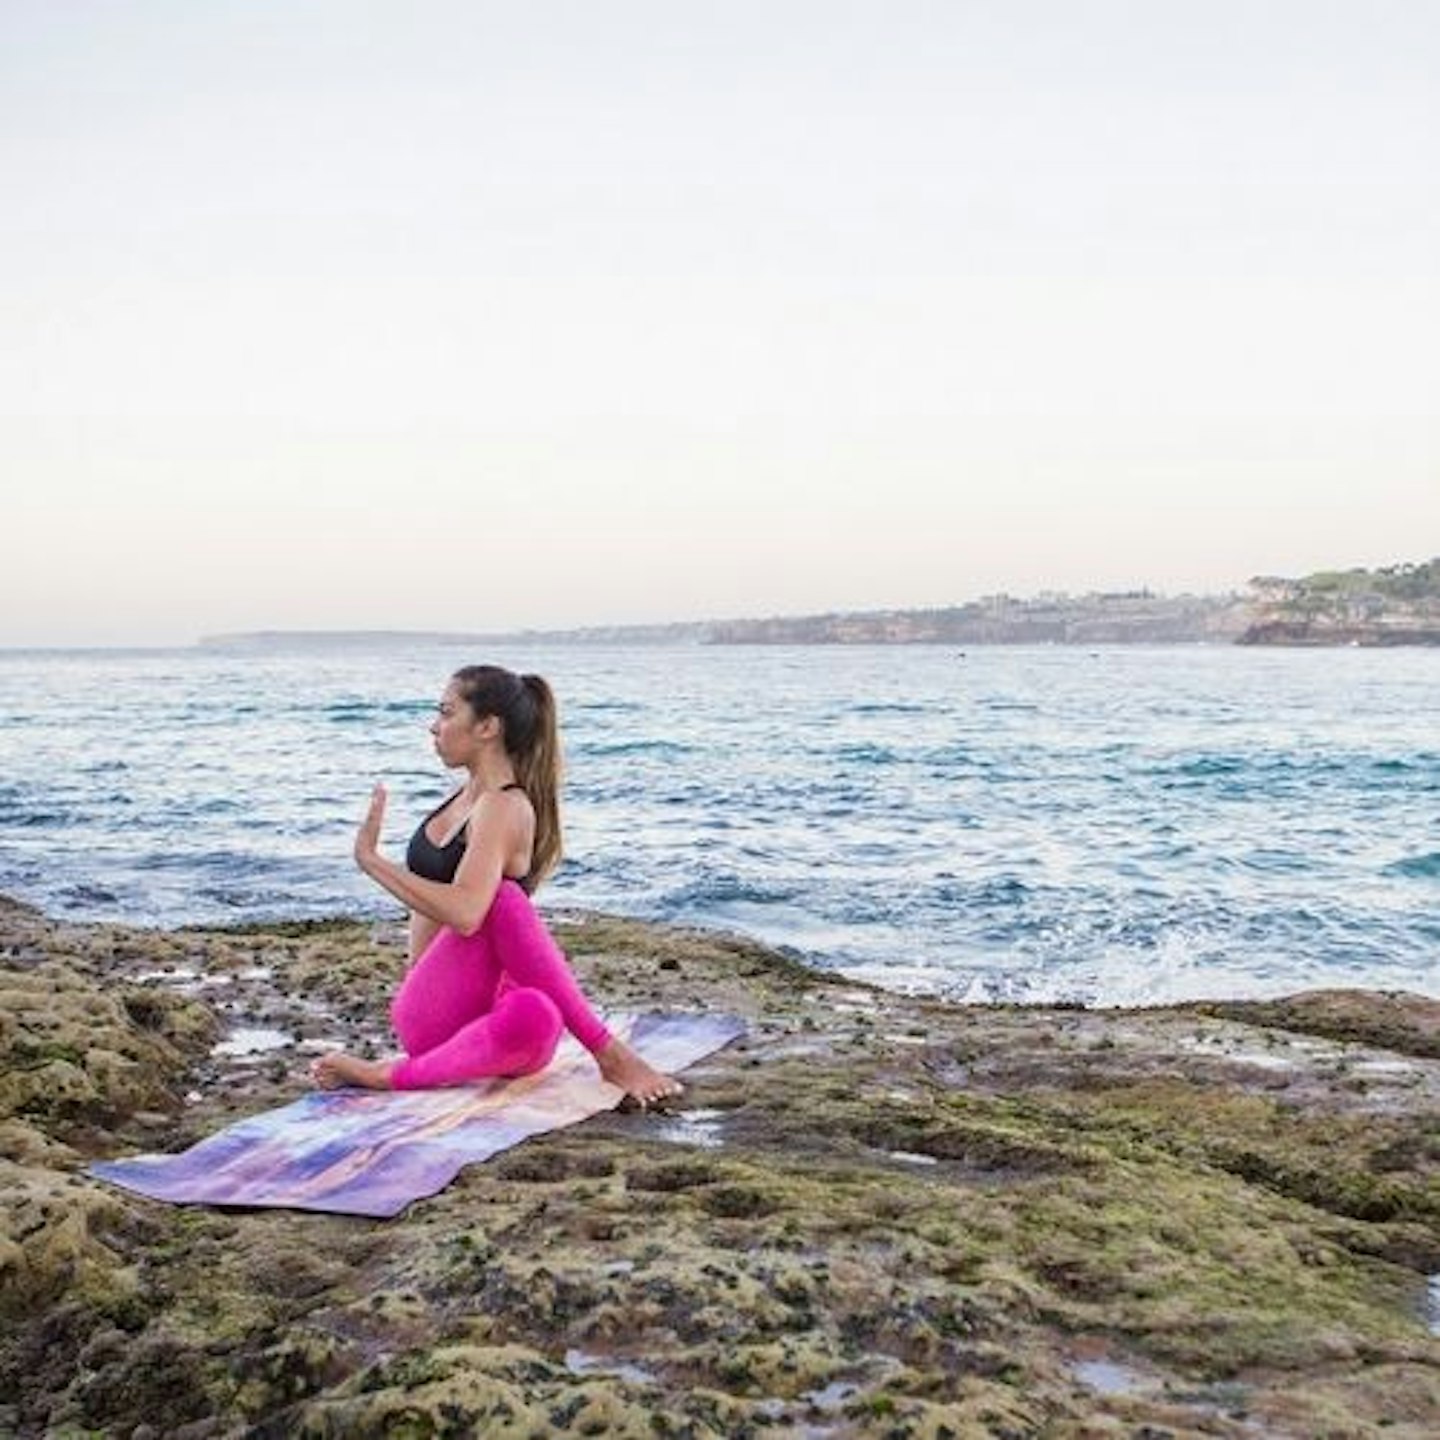
Yoga Design Lab
Design is everything when it comes to yoga mats, and this colourful number definitely speaks for its self. Pros: The mat is made from the softest material, which will ensure you're comfortable in any position. Plus, it's ultra-grippy which will hold you in place too. Cons: The price is of this might see some looking in a different direction, but this quality mat should last for years.
.jpg?auto=format&w=1440&q=80) 4 of 6
4 of 6Cork Yoga Mat
We're here to tell you about all the benefits a cork yoga mat has... Pros: Not only is this made from eco-friendly material, but it also slip-resistant, great with heat, naturally antimicrobial and odour-free with self-sanitising properties. Cons: It's not very good if you need to carry it around and it also requires a lot of upkeep.
 5 of 6
Personalised Custom Yoga Mat With Your Image
Yoga is all about balance, right? And, we think that this mat has everything you need to steady your yoga practice. Pros: Aesthetically, you can get this mat exactly how you want it. Forget spending hours searching the web trying to find the right design for you, when you can design it yourself. Cons: Your grandchild might not appreciate their face all over your exercise mat.
 6 of 6
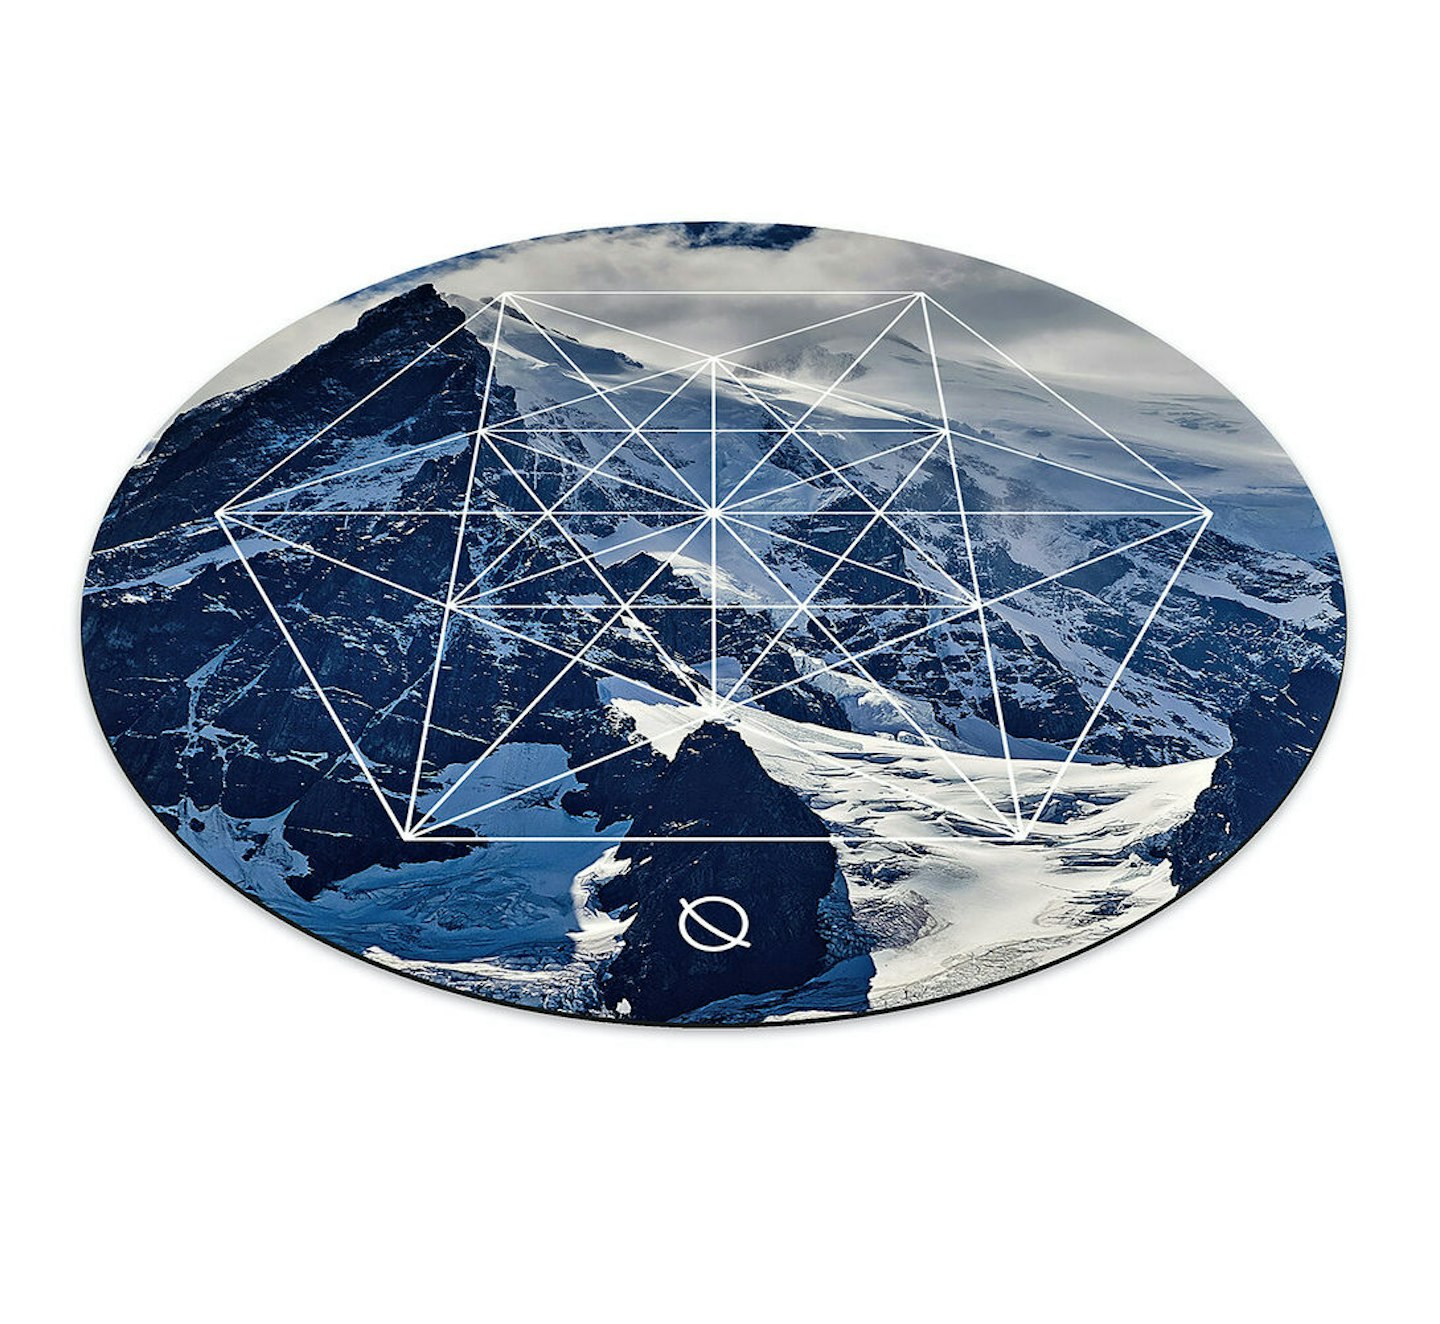
Elevate Pro Round Mat
Due to the shape of the Form round mat, it creates a large open space, allowing you to take your workout in any direction.Pros: Features a Form Grid, developed to improve alignment and consistency throughout your workout.Cons: It may feel a little strange to use a circle mat but go with it!
